
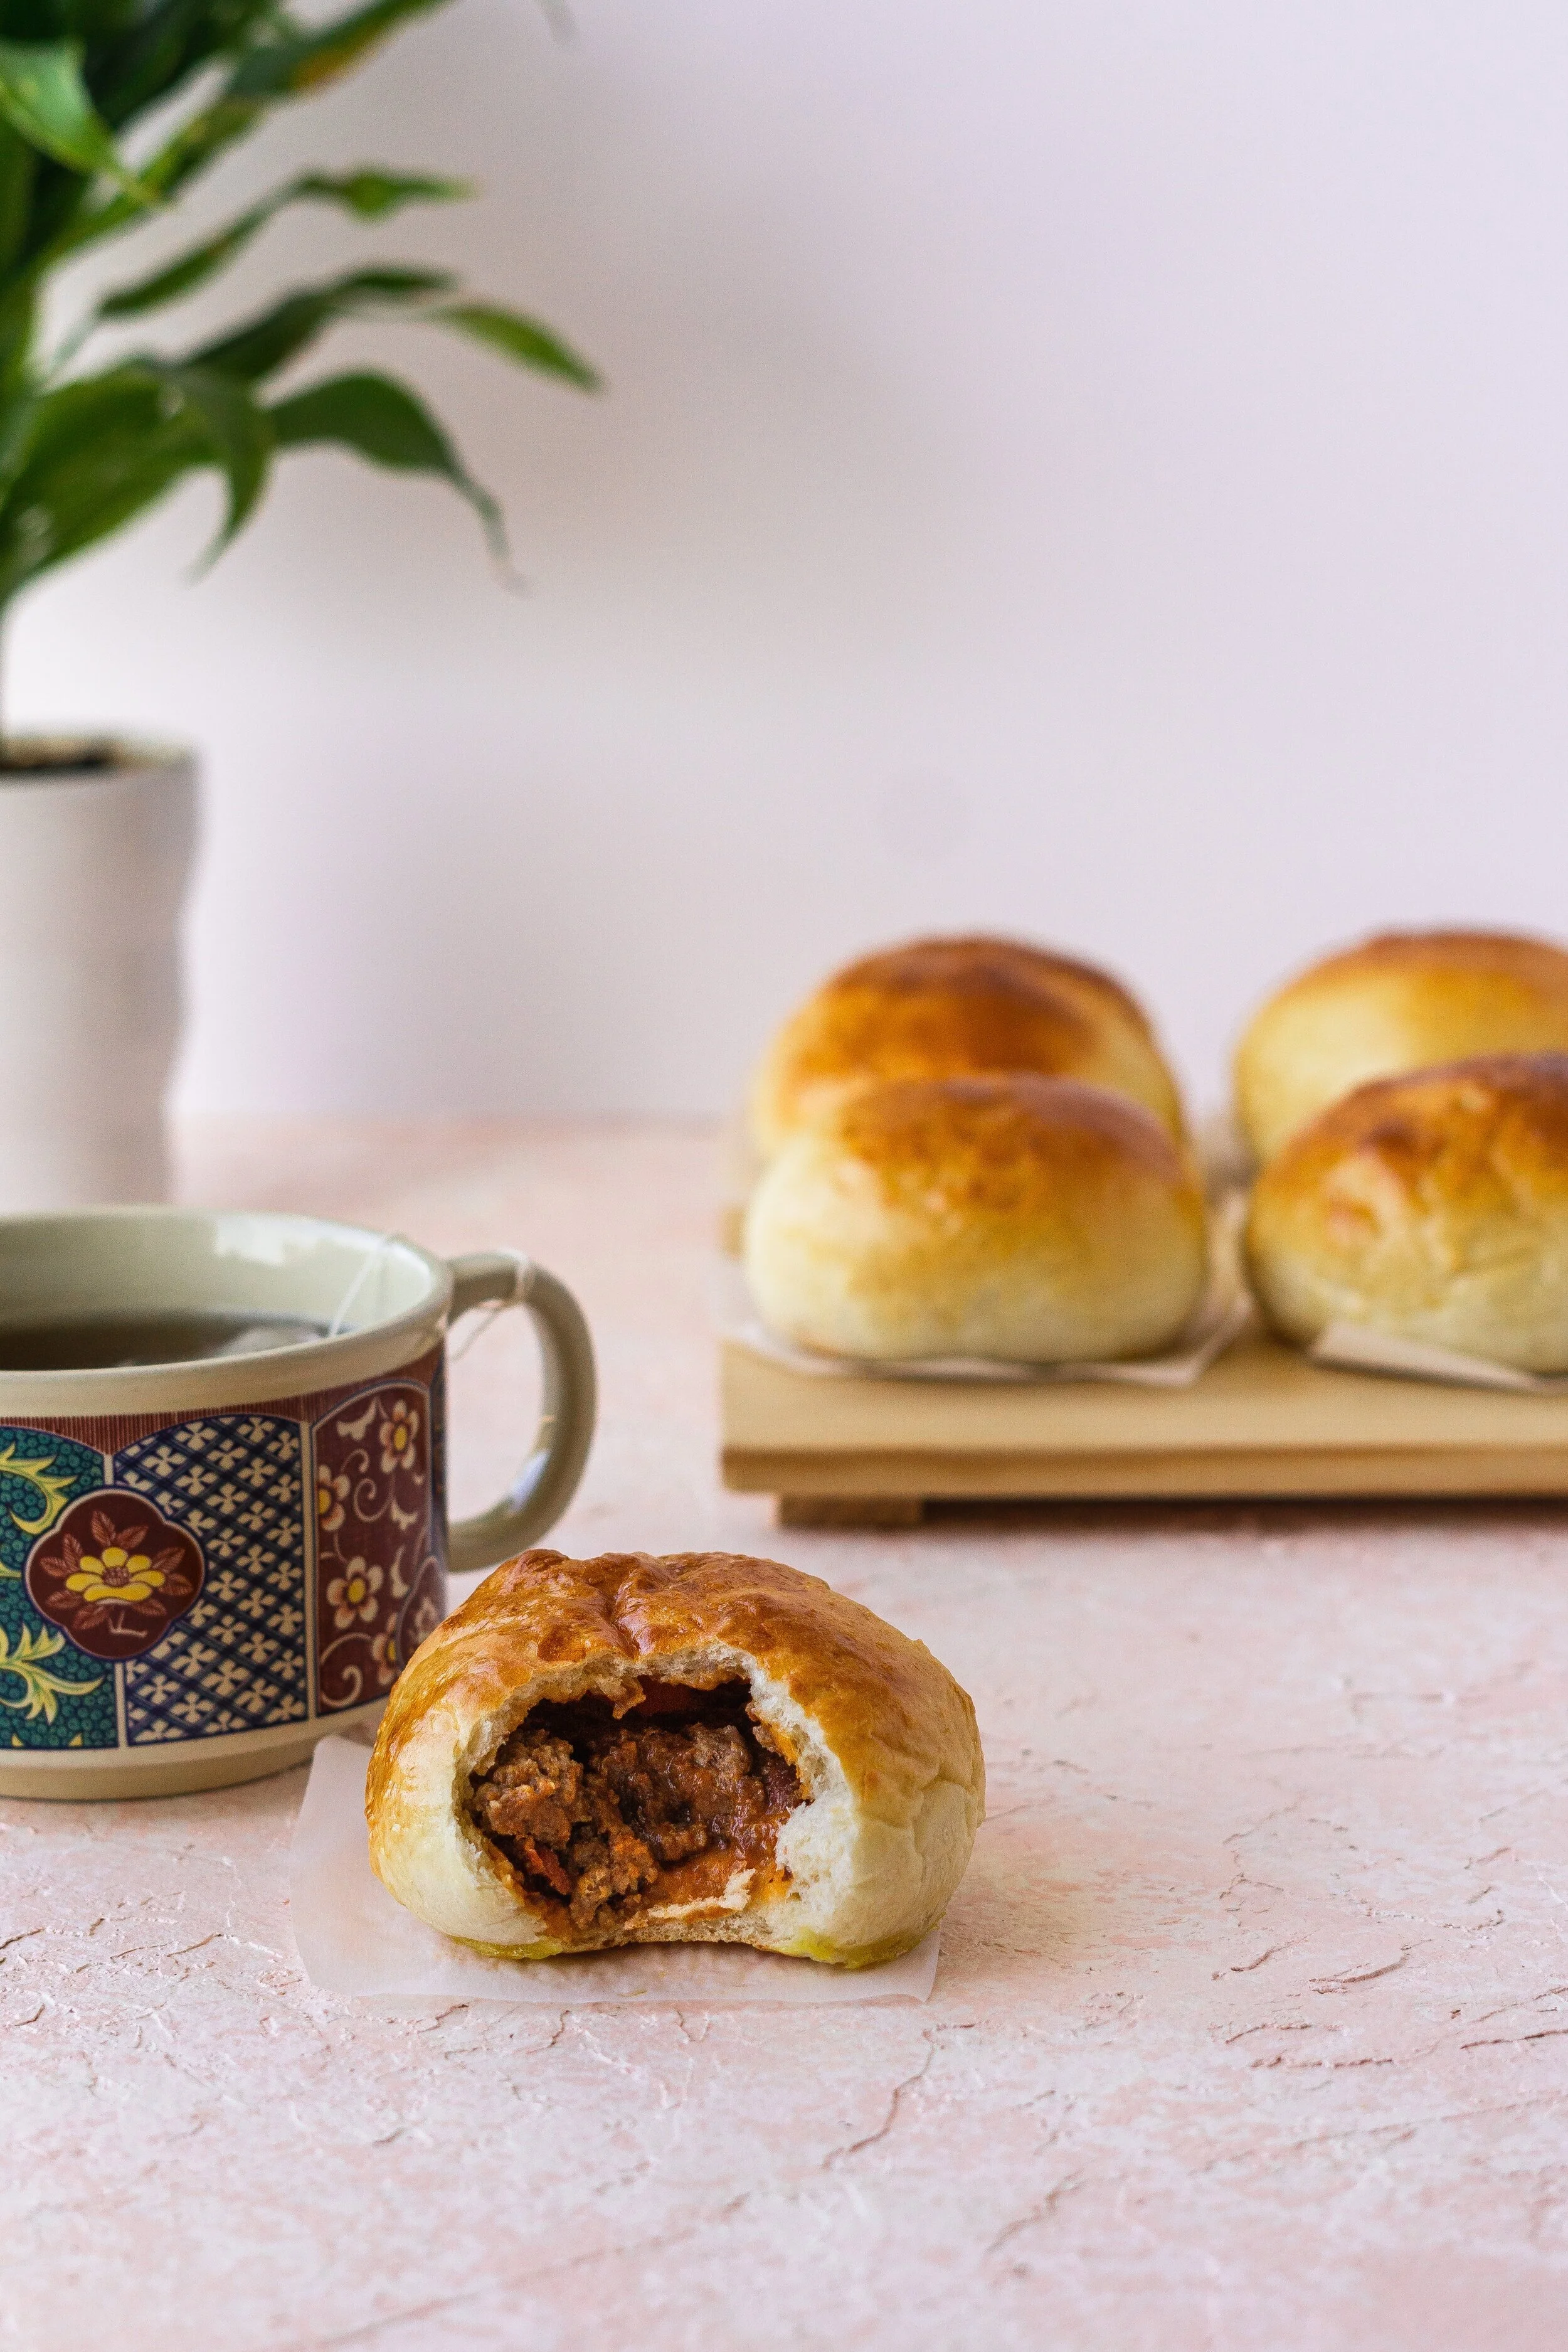
Chili Cheese Baos
This post may contain affiliate links and I may earn a small commission when you click on the links at no additional cost to you. As an Amazon Affiliate I earn from qualifying purchases.
While I despise that we’re still sheltering in place 9 months into a pandemic, I will say that the continued aversion to grocery shopping has done wonders for my culinary creativity.
One night back in August, I lay awake in bed with a deep craving for dim-sum. As Alex snoozed, I pulled the covers over me head to shield the light from my phone. Into the wee hours, I scrolled through yelp pages perusing bay area dim-sum spots and Chinese bakeries, trying to decide which establishment may be worth breaking our isolation.
However, not wanting to risk it, I turned my attention to the possibility of making dim sum at home.
I had never considered it before. Despite the laborious nature of making these bite-sized delights, it’s the plethora of great quality and economic options available in the city that made home-made dim sum seem impractical. But these are desperate times.
Could I make them at home? What would I make? Would it even be worth it? I couldn’t possibly make dim sum BETTER than say, Dragon Beaux or Hong Kong Lounge… but what if I wasn’t aiming for better? What if i did something so different you couldn’t compare?


I thought of items ripe for re-imagination like har gow, but make it shrimp scampi. Or siu mai, but make it taco seasoned. My head flooded with possibilities, albeit not all of them good. But one stuck: the good ol’ char siu bao.
Char siu baos have that soft and subtly sweet fluffy milk bread that would be a lovely canvas for so many new fillings. I didn’t have pork in the fridge, to be honest I didn’t have much in the fridge. But I did have a block of cheddar cheese and a lot of emergency food, including the Costco pack of canned chili… and such is the origin of these Chili Cheese Baos.

I also love that these baos use canned chili which not only makes execution easier, it gives us a reason to chip away at the mountain of canned goods we bough back in February…
I hope you enjoy this creation as much as we do!
The Recipe
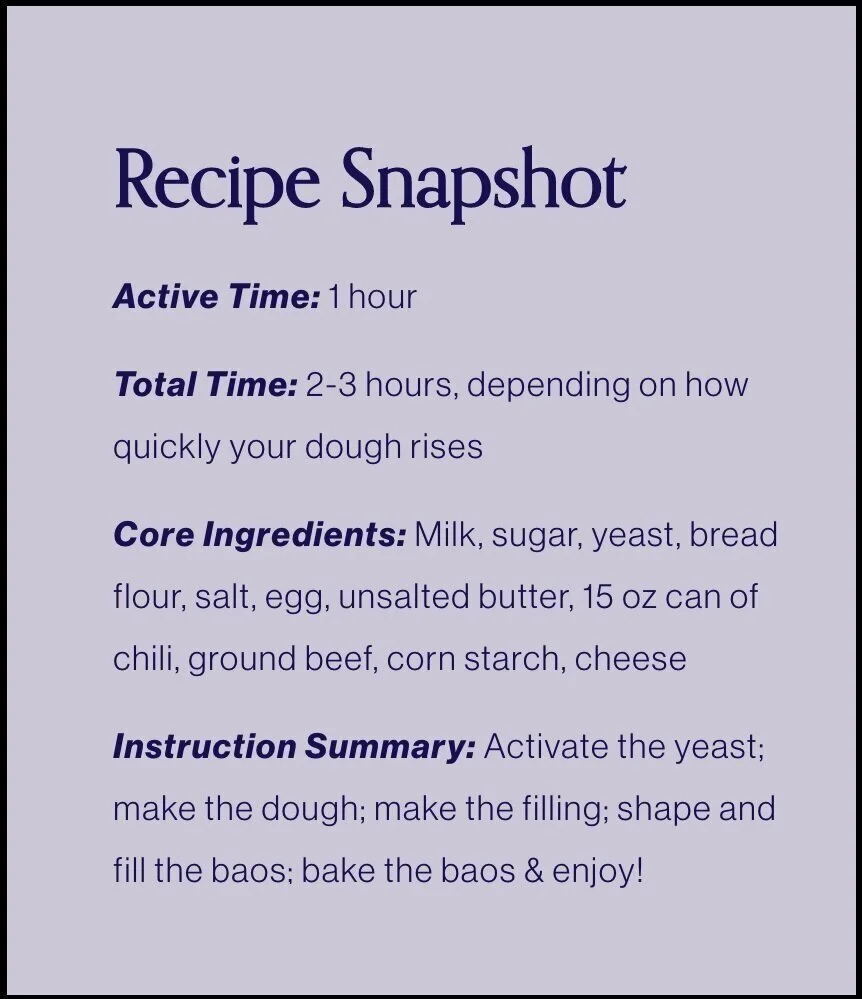
Makes 10 large baos or 12 medium baos
Ingredients
Bao Dough
1 cup + 2 teaspoons (250 ml) milk — 2% or whole milk
1 packet (2 ¼ teaspoons or 7 g) active dry yeast OR 1 ¾ teaspoon instant yeast
3 tablespoons (40 g) granulated sugar
1 teaspoon (5 g) salt
3 cups (400 g) bread flour
1 large egg
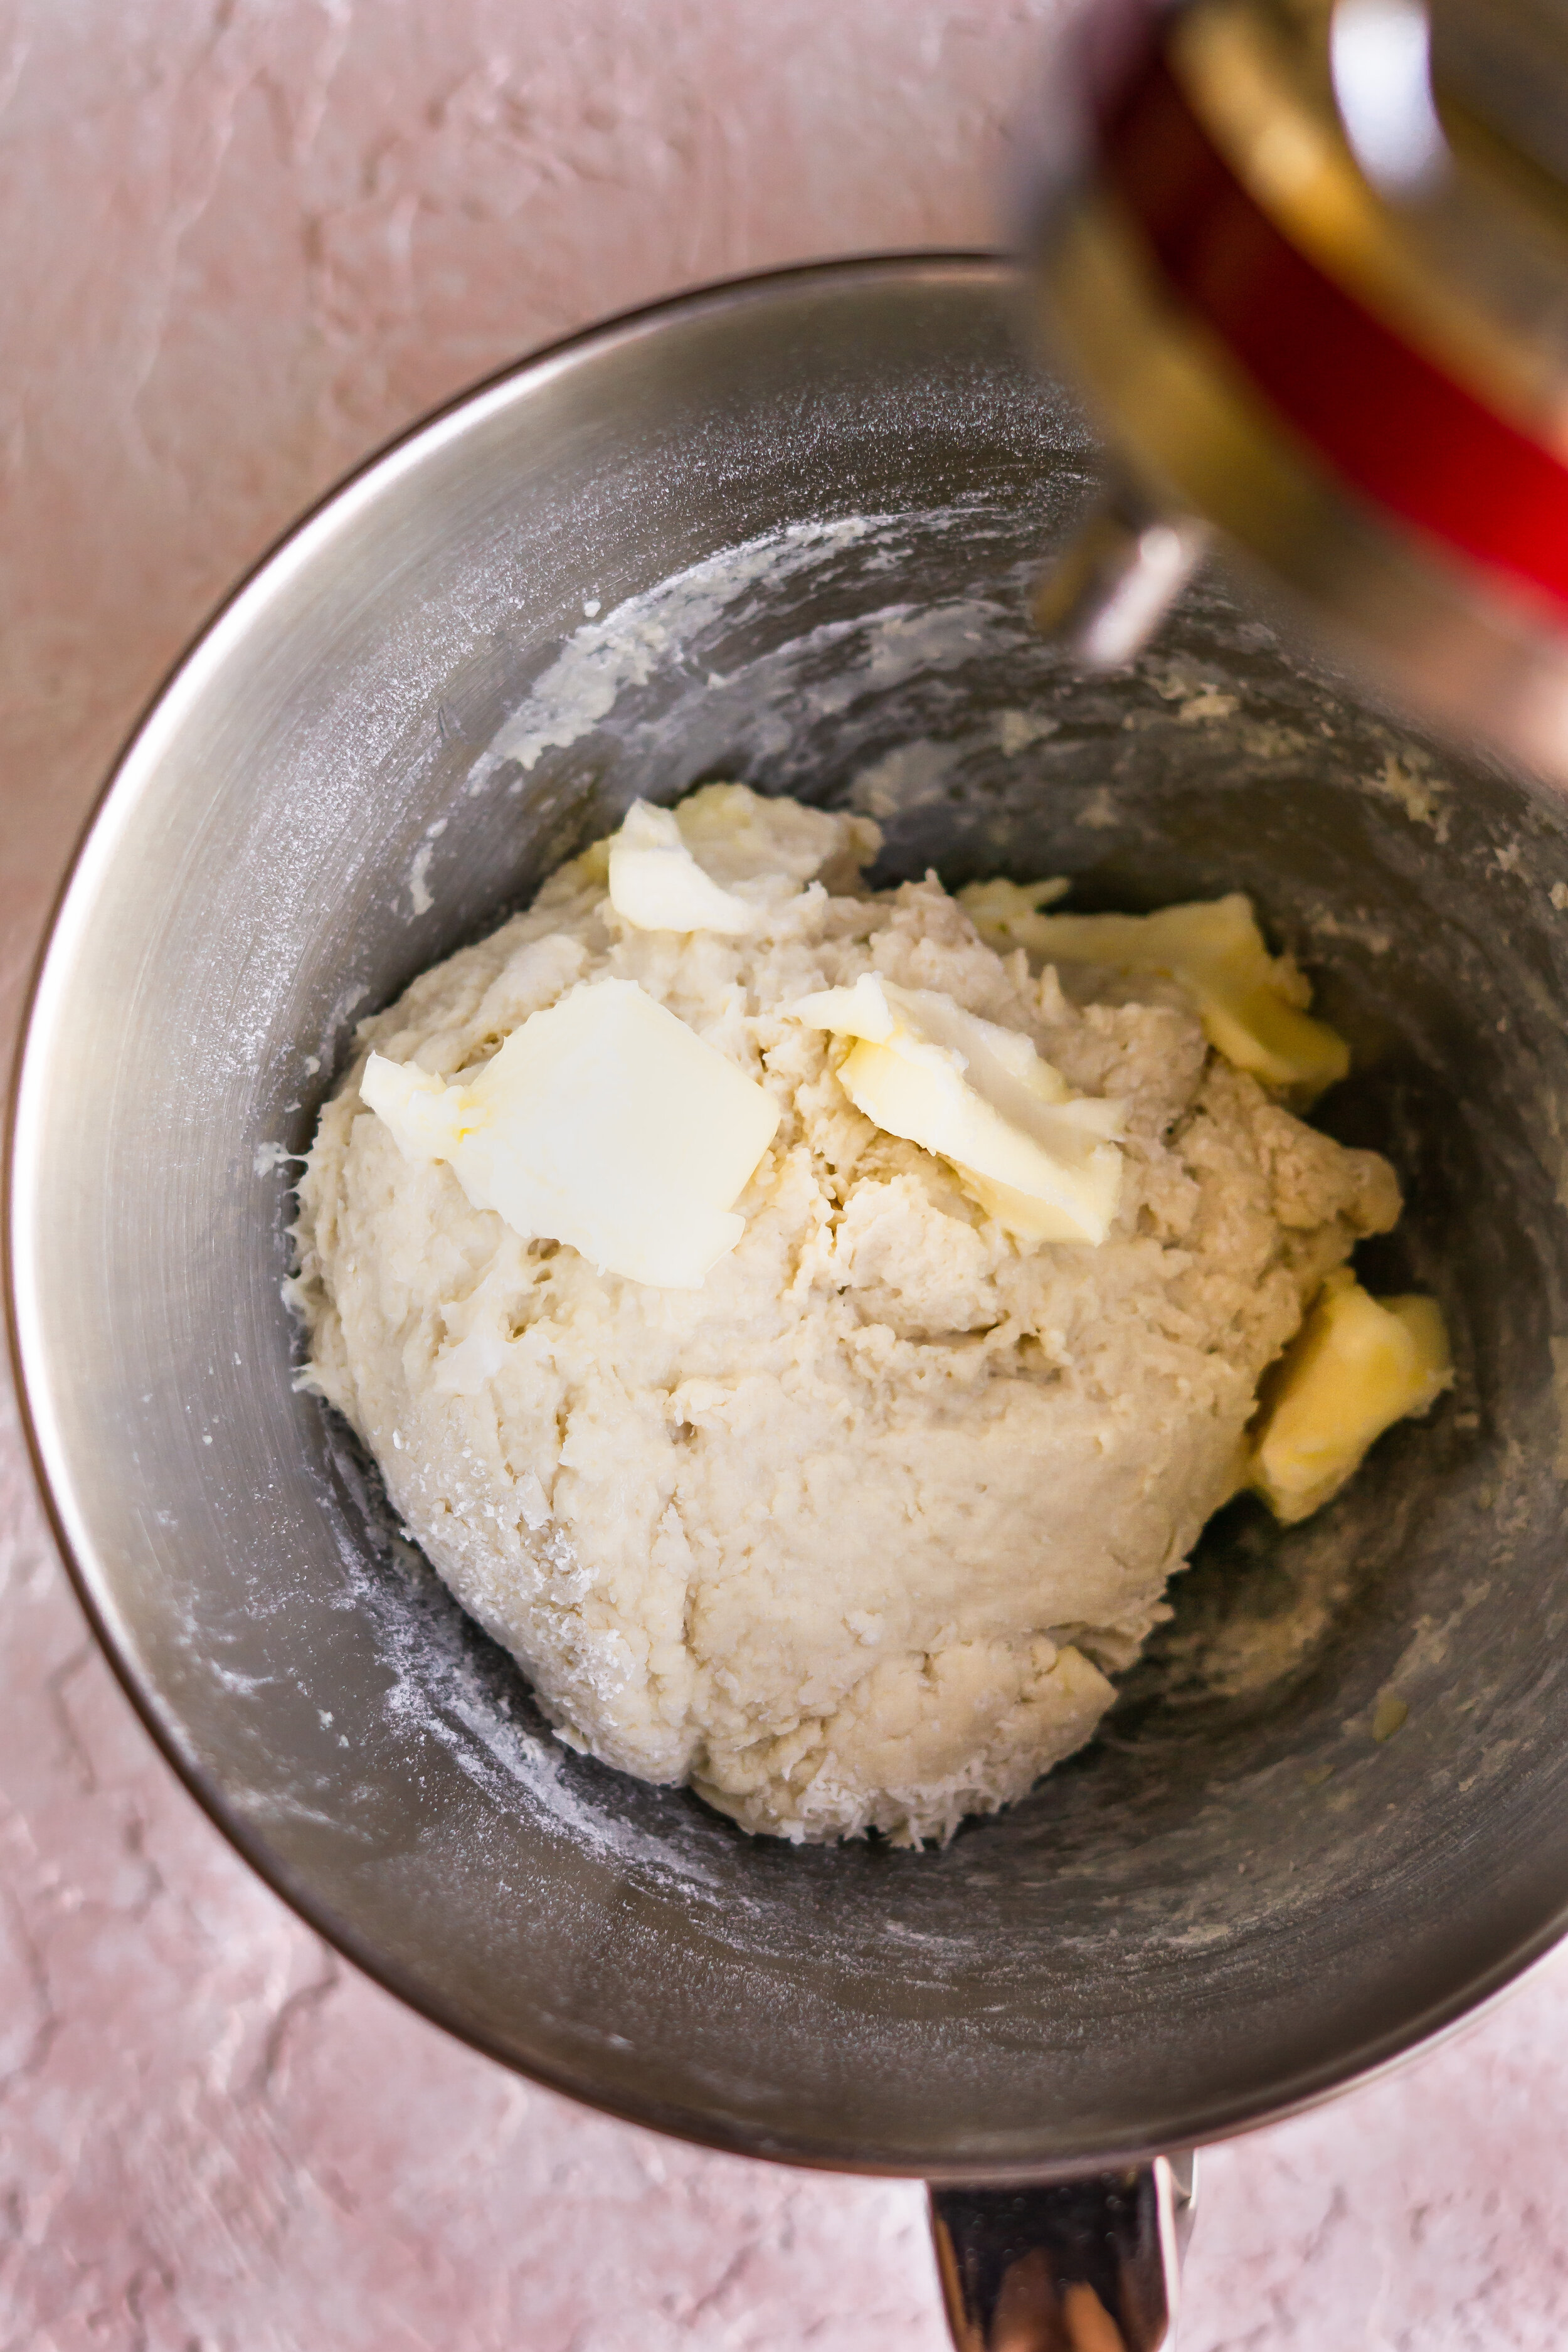
4 tablespoons (60 g) unsalted butter, softened
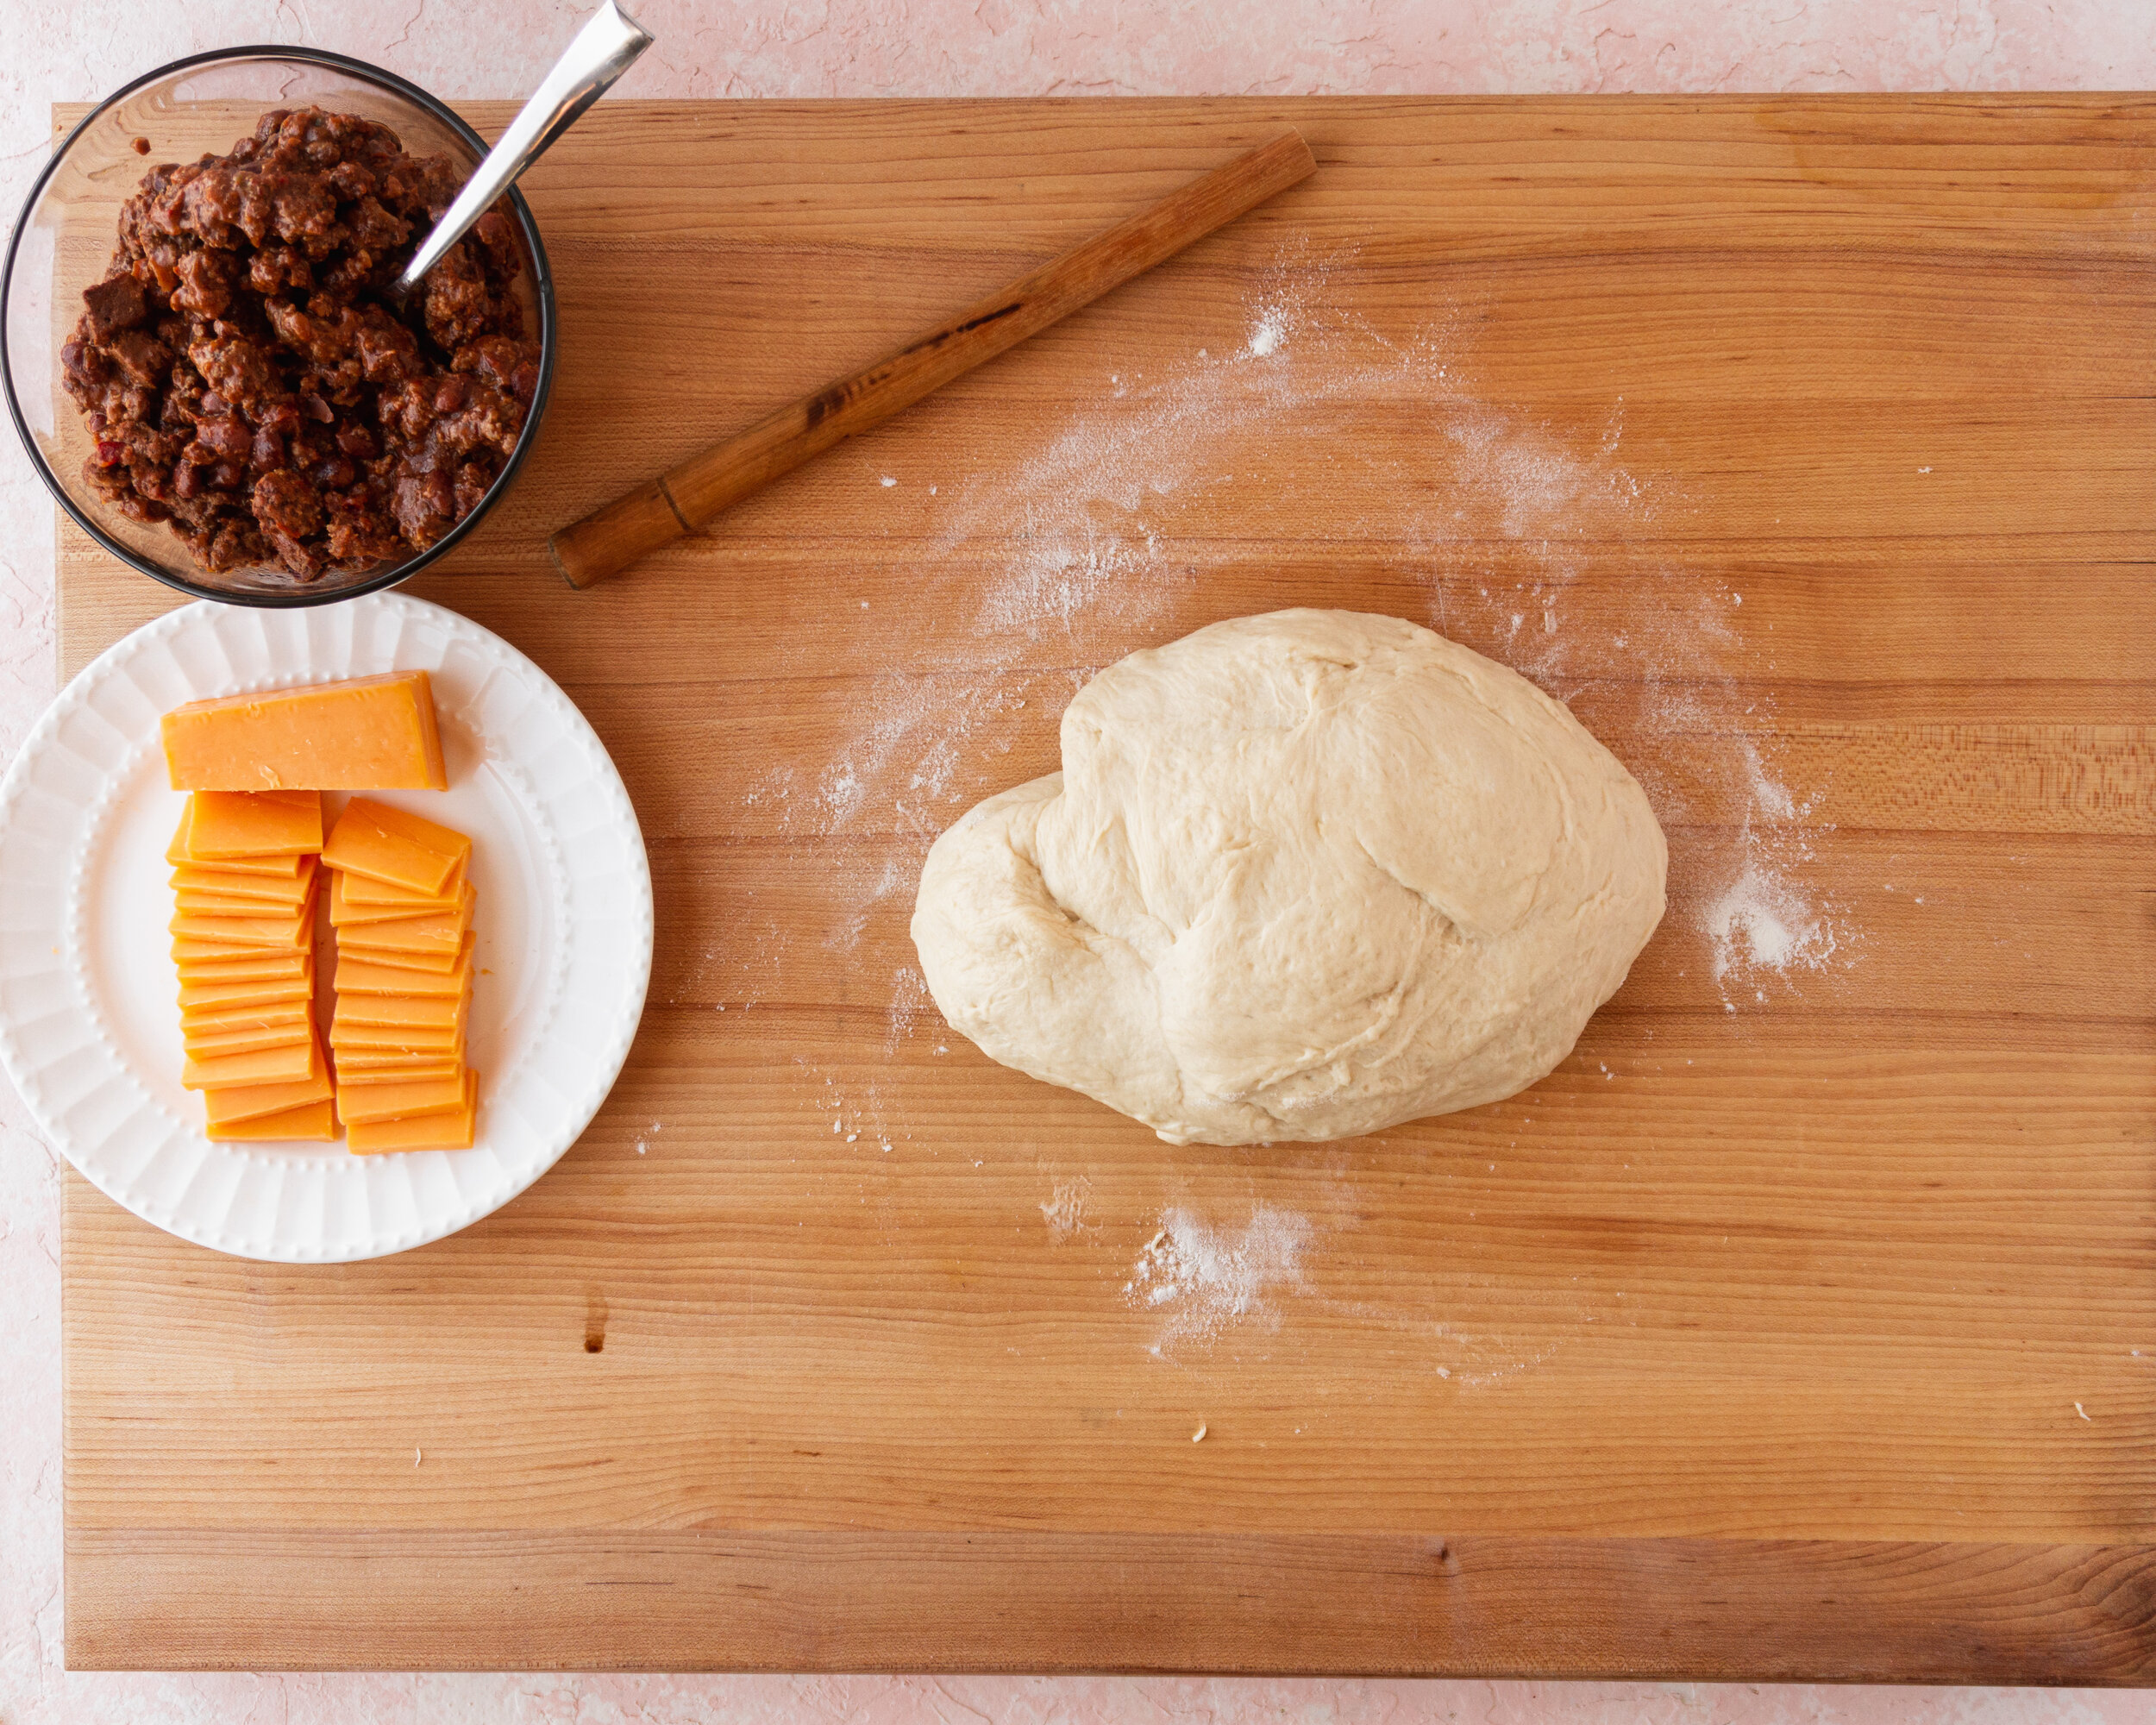
Chili Cheese Filling
½ pound ground beef, or other ground meat of choice
1 15oz can of chili — I like Stagg Steakhouse Reserve
1 tablespoon cold water
2 teaspoons corn starch; 1 tablespoon if your chili is quite soupy
½ - ⅔ cup cheese, shredded or sliced (🔥Choose Your Own Cheeseventure)
Egg Wash
1 egg
2 tsp milk
Instructions
Activate the yeast
Pour the milk into a microwave safe bowl, then heat for 30 seconds or until the milk is slightly warm but not hot (🎩Yay For Yeasties ). Add the sugar and yeast, then stir to combine, trying your best to break up any large clumps of yeast.
Let the yeast rest for 10-15 minutes or until the yeast is foamy and smells fragrant.
Make the dough
In the bowl of a stand-mixer, combine the bread flour, activated yeast mixture, egg, and salt. Attach the dough hook, then run the mixer on low to combine the dough into a shaggy ball (🎩 Manual Mode).
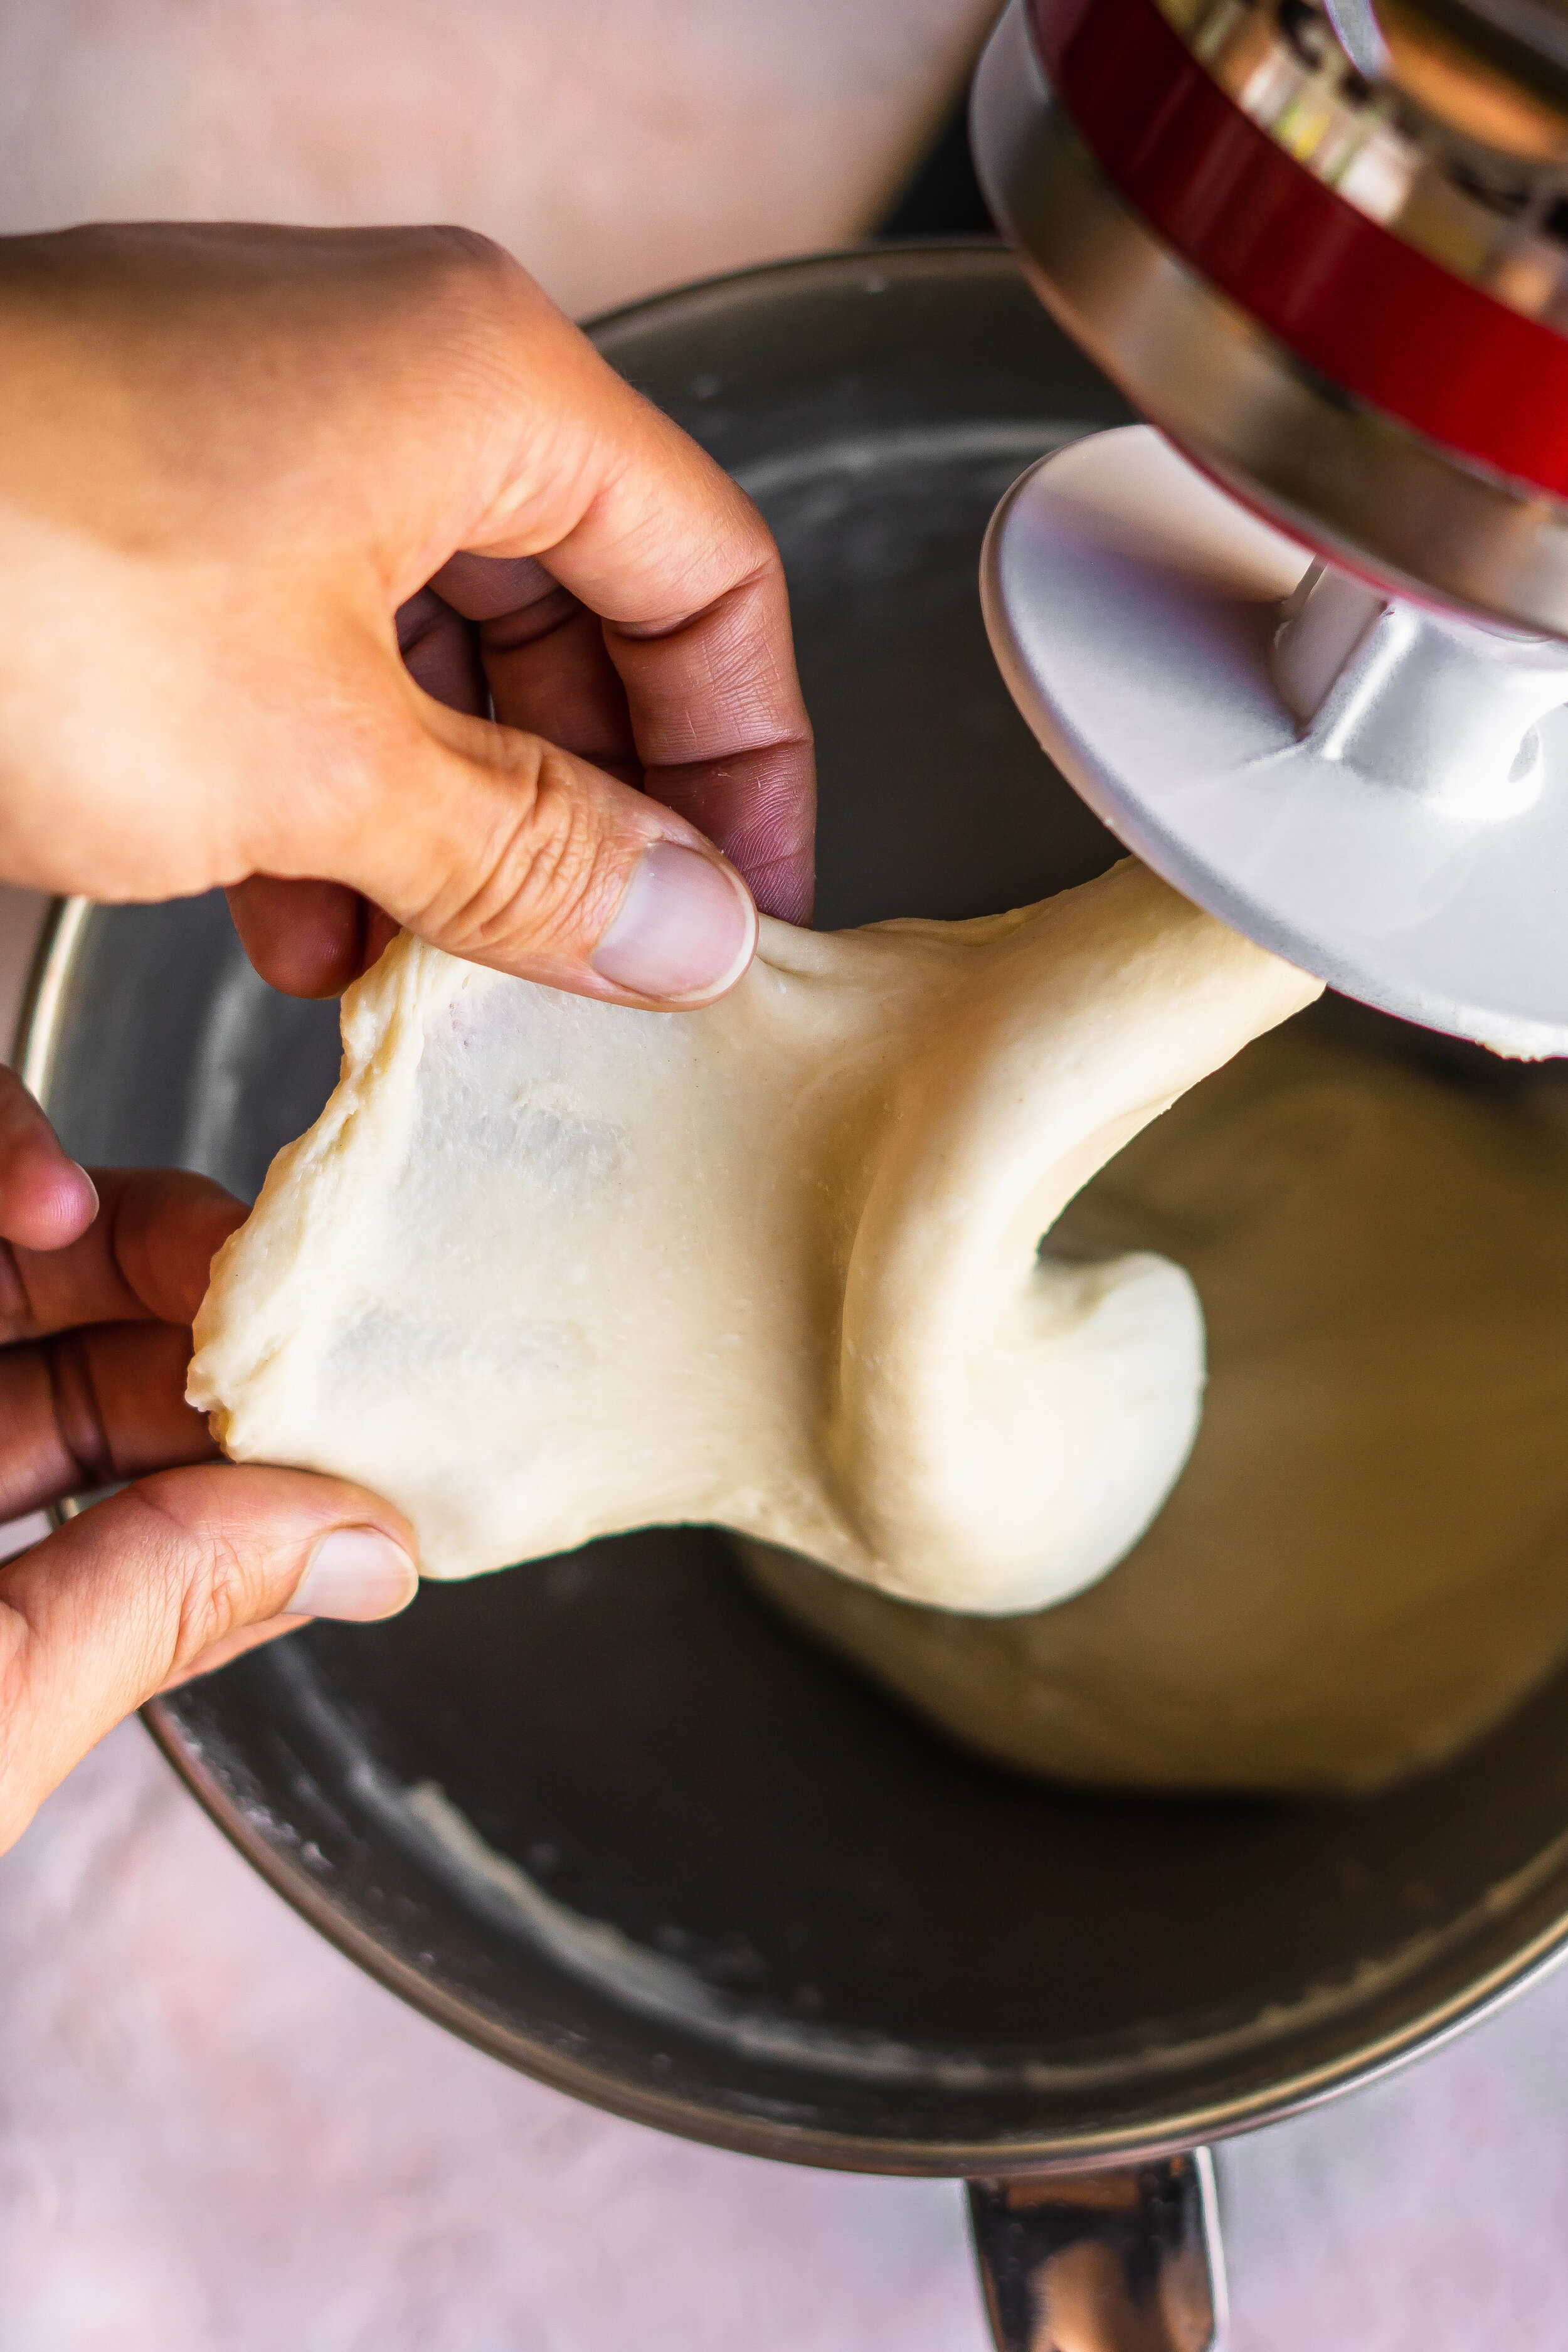
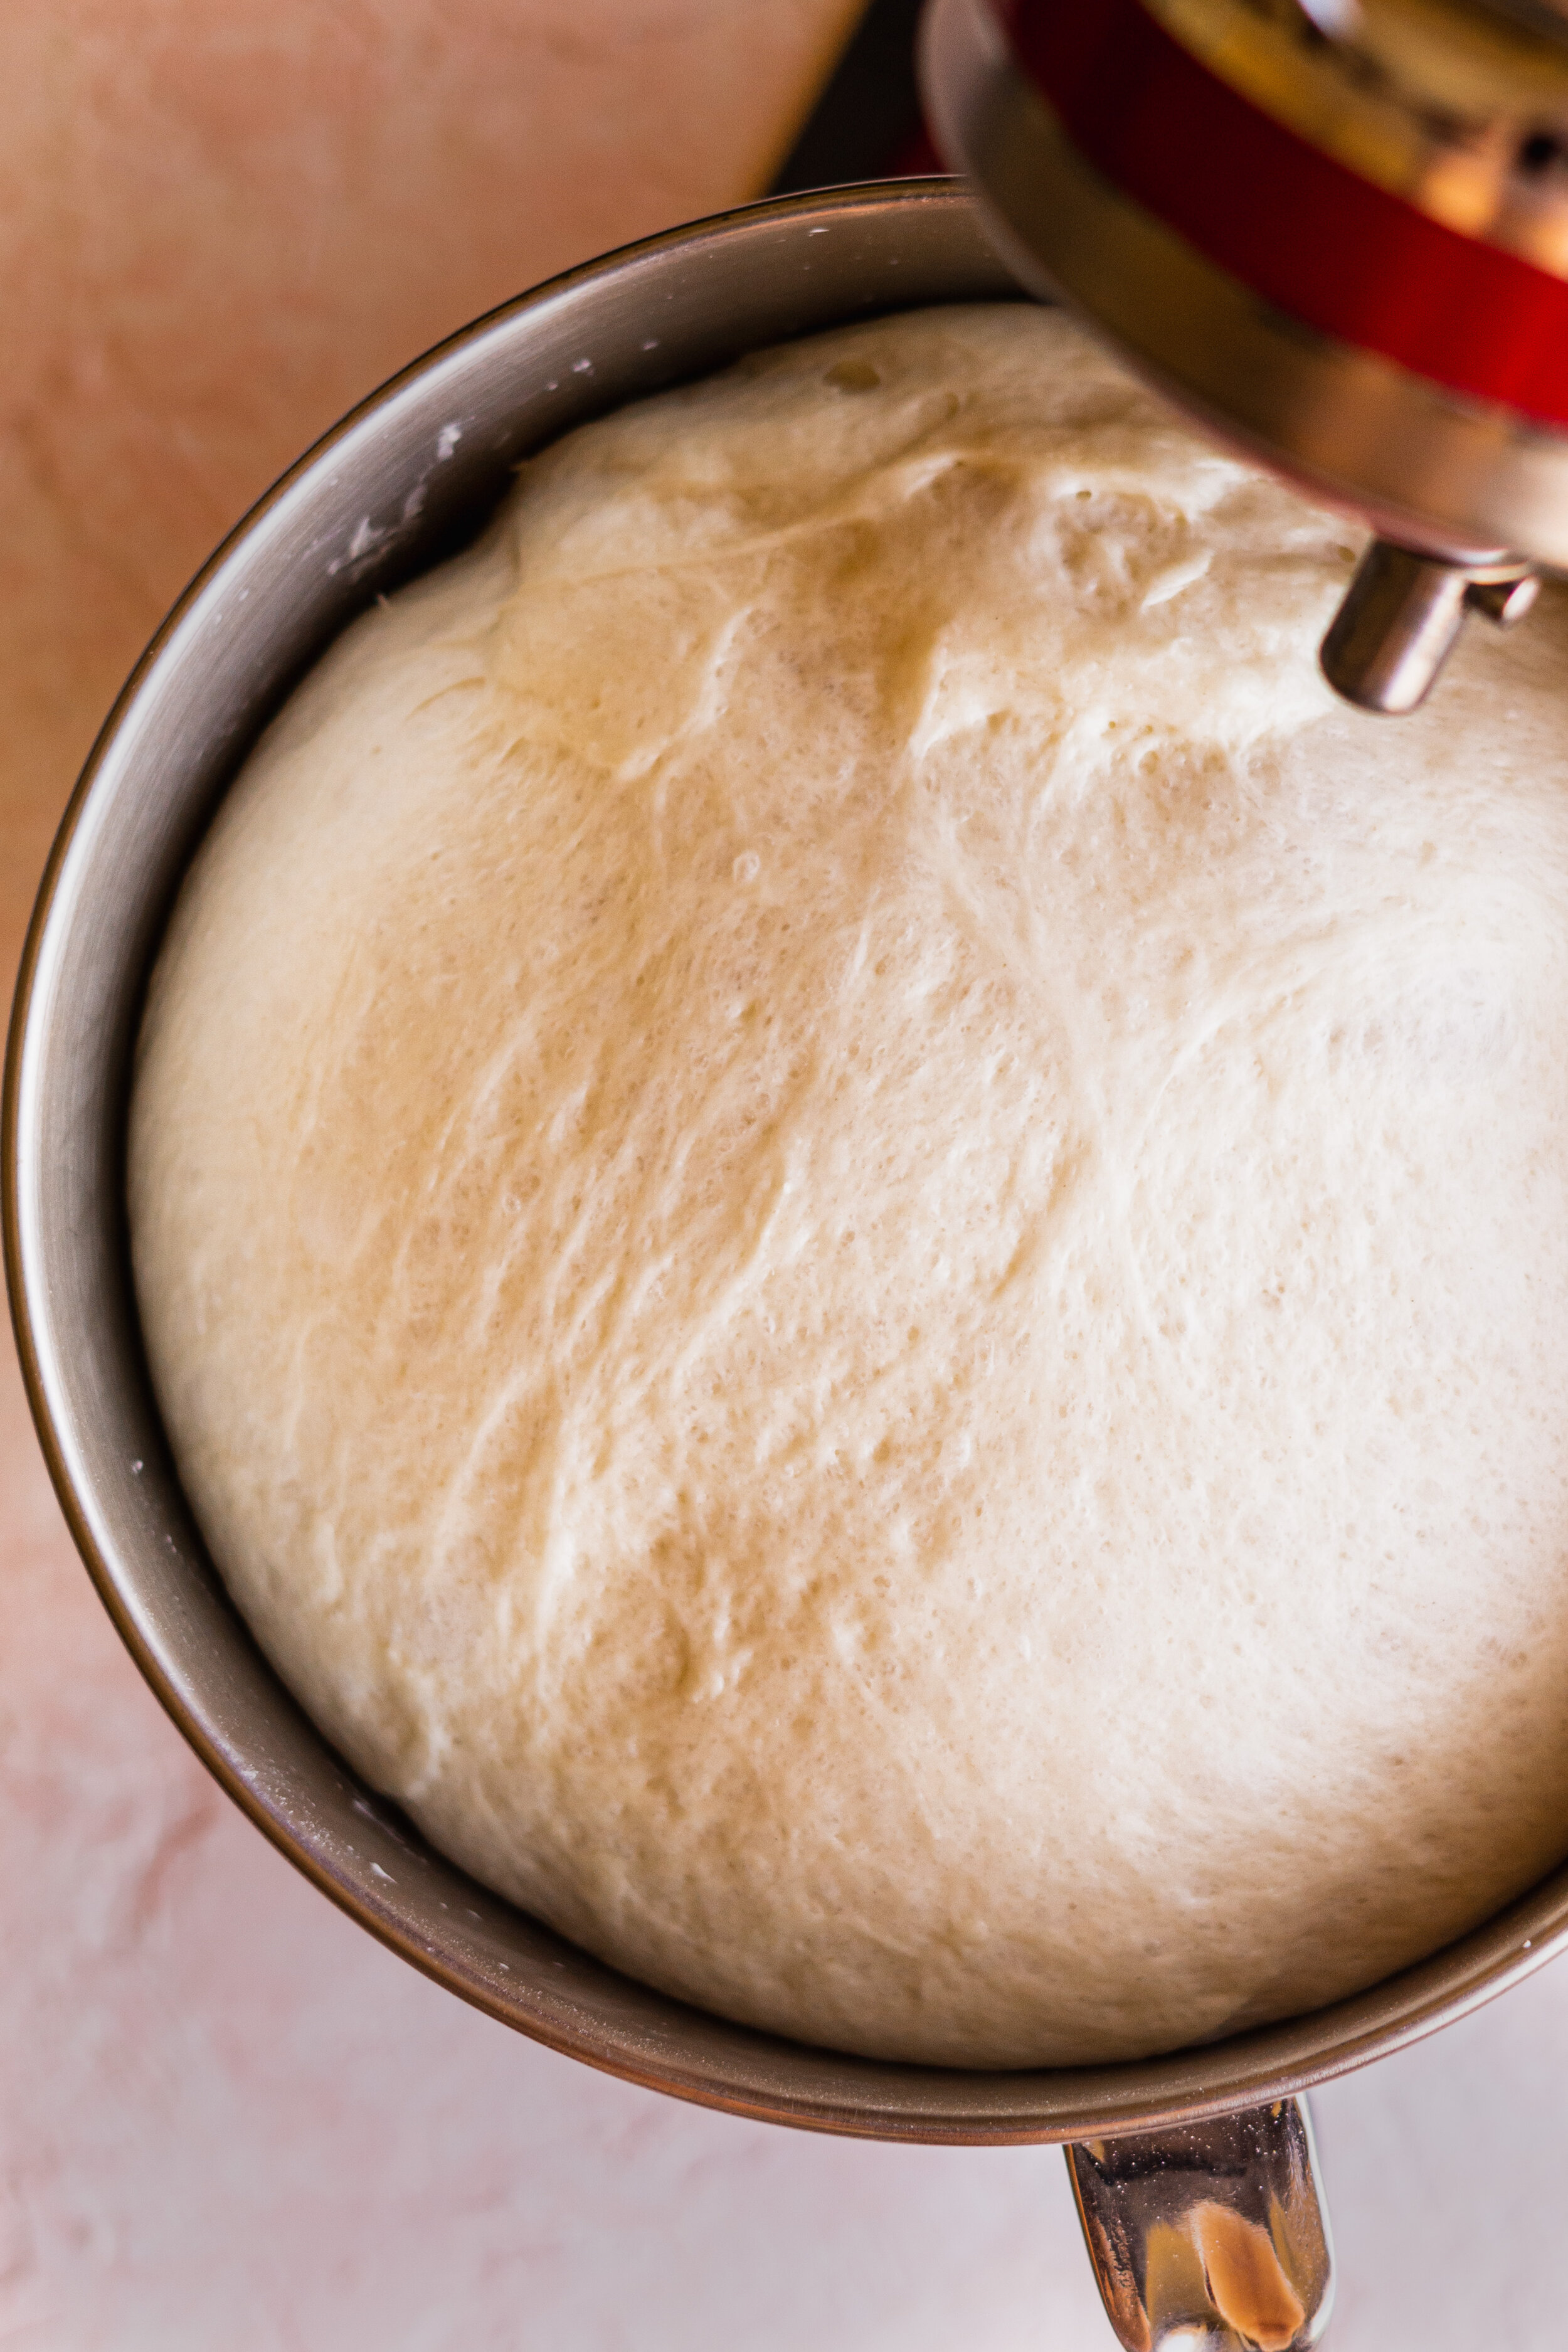
Add the butter, then turn the mixer up to a medium-fast speed (speed 6 on my Kitchen-Aid). Knead the dough for 12-15 minutes, or until it’s smooth. You should be able to stretch it into a thin translucent sheet without it tearing (see the process shot in the intro).
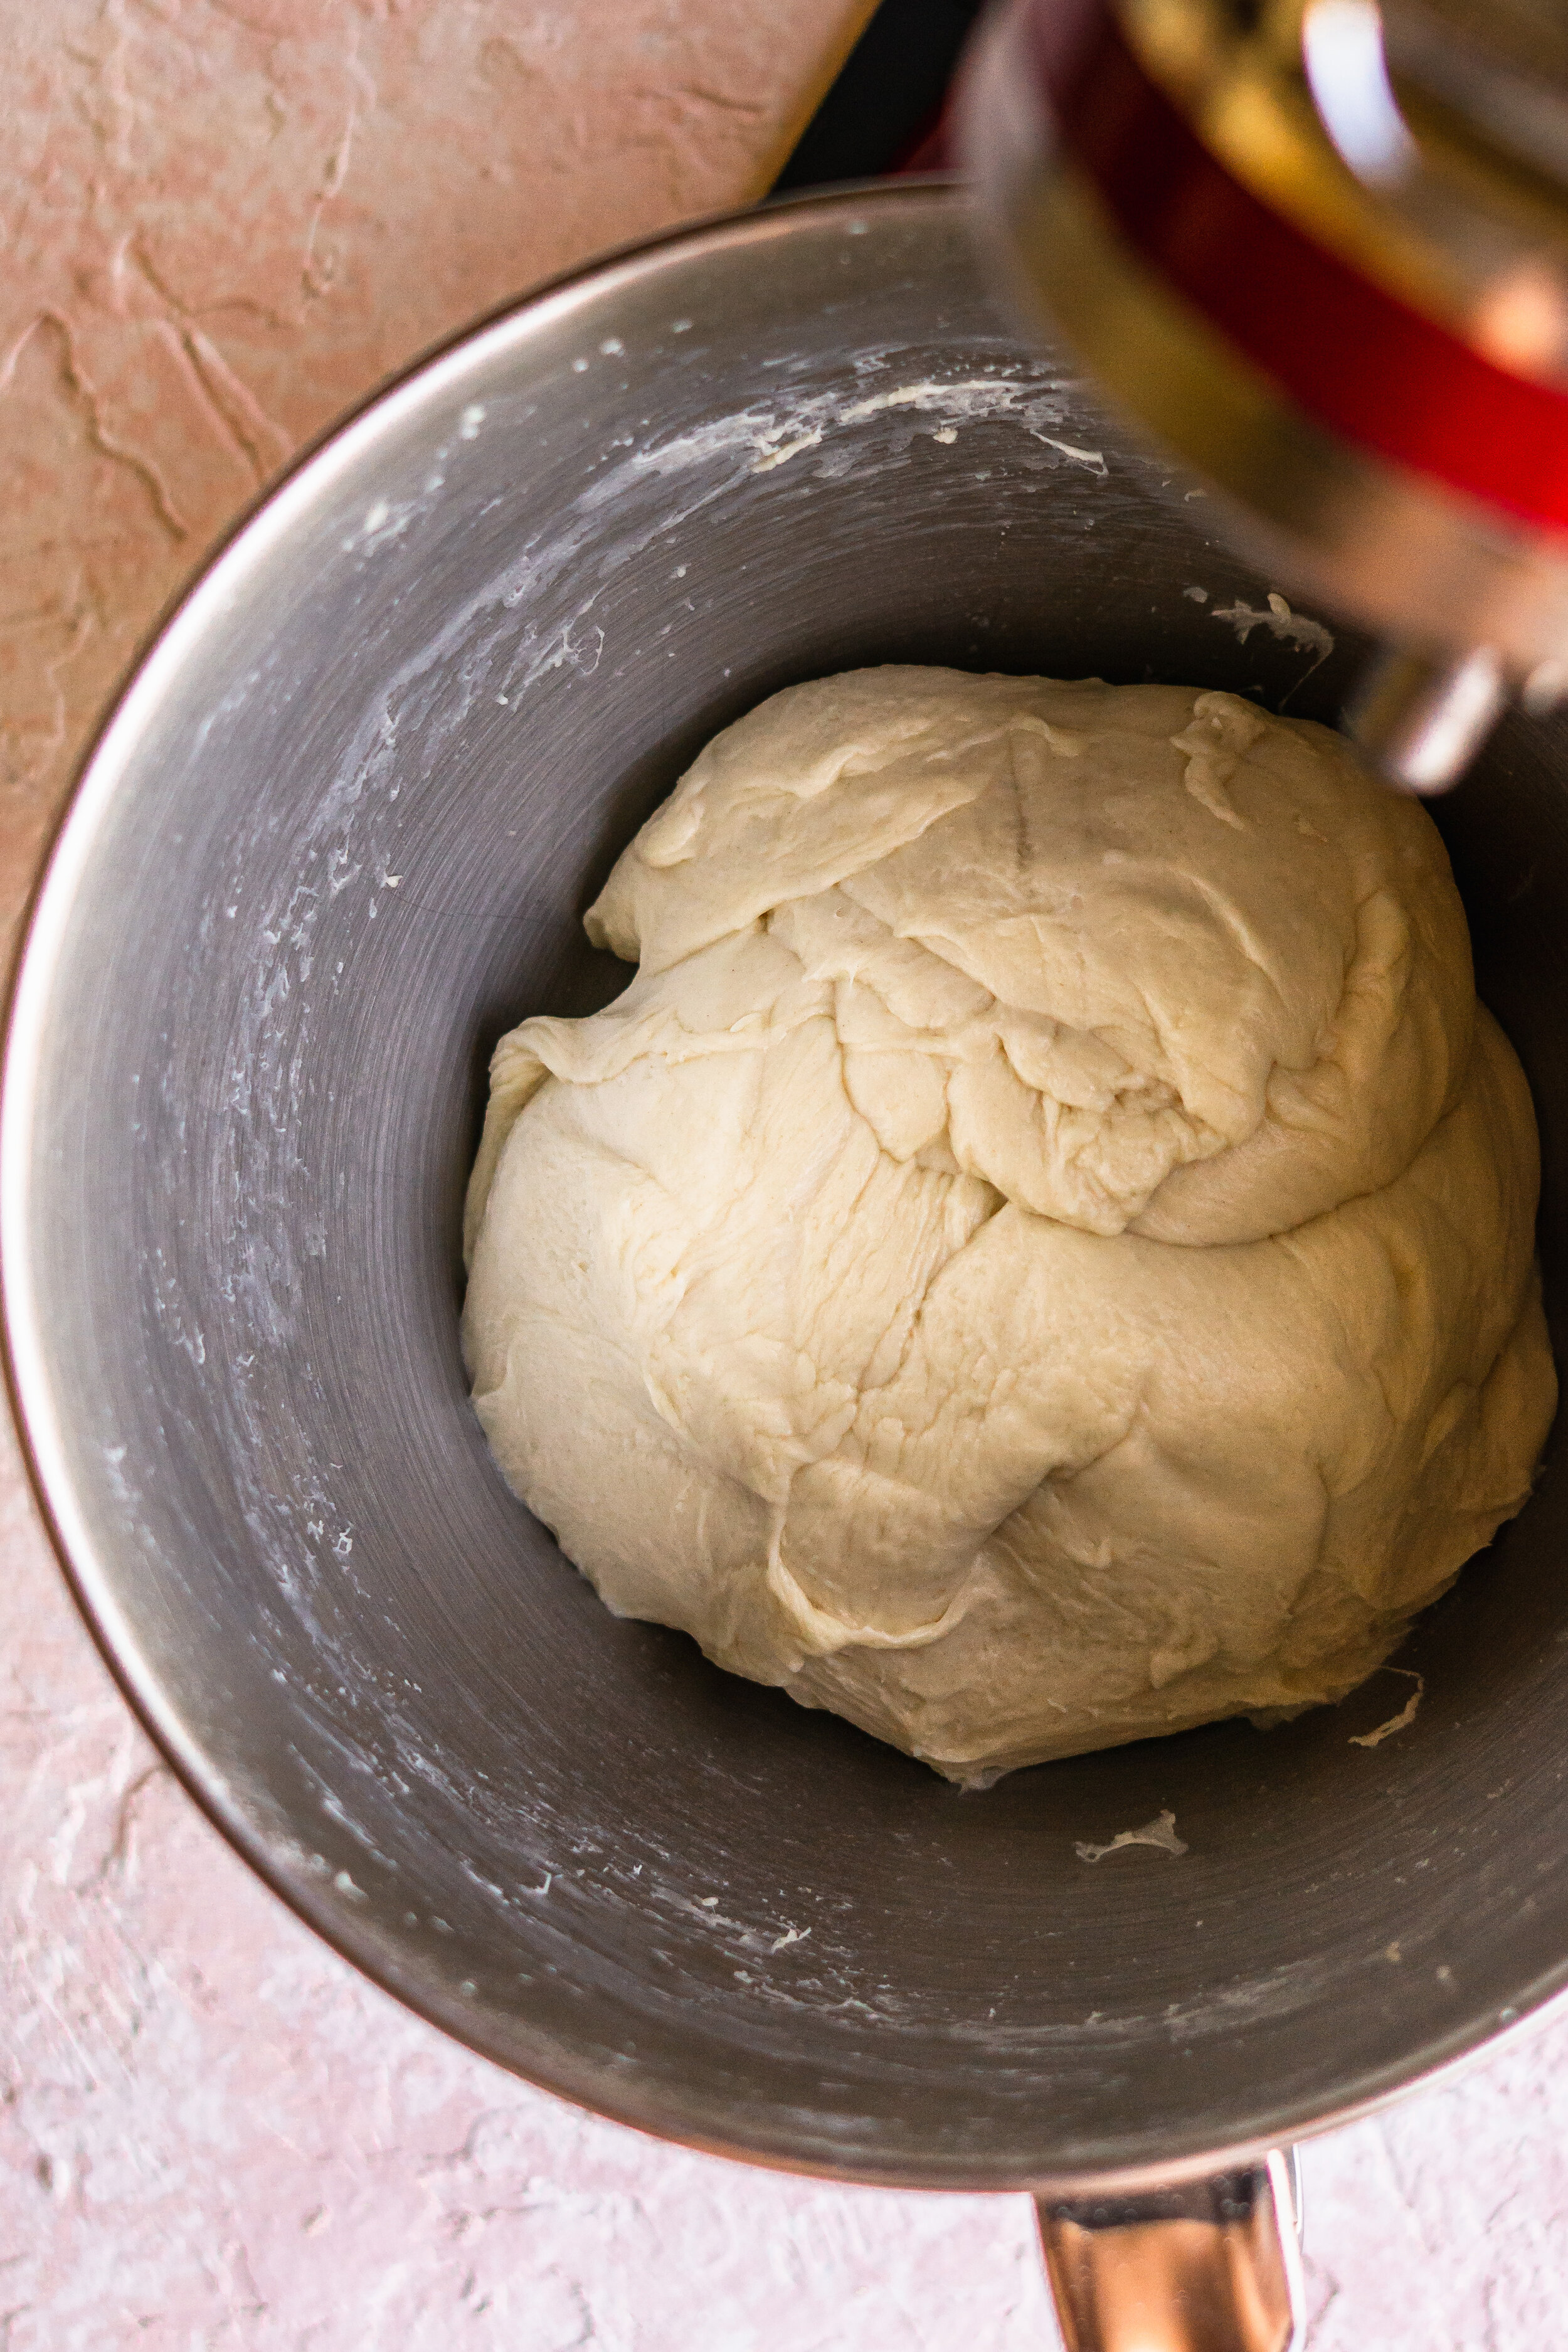
Lightly oil or butter a medium-sized bowl. Transfer the dough out of the stand-mixer bowl and into the oiled bowl. Then flip the dough over so that both sides are coated in oil/butter. Cover with plastic wrap.
Let the dough rise until doubled — about an hour if the room is warm, two if it’s cold.
Make the filling
While the dough rests, make the filling. Combine the cornstarch and water. Mix until the cornstarch is dissolved.
In a skillet over medium heat, add the ground beef. Brown the beef, breaking it up into pea-sized pieces, or larger if you want big chunks in the bao (🎩All Beefed Up).
Once the beef is browned, add the chili, then stir to combine. Give the cornstarch another quick stir, then add it to the beef chili. Cook the chili for 5 minutes stirring frequently to prevent burning.
Let the chili cool completely before filling the baos.
Shape and fill the baos
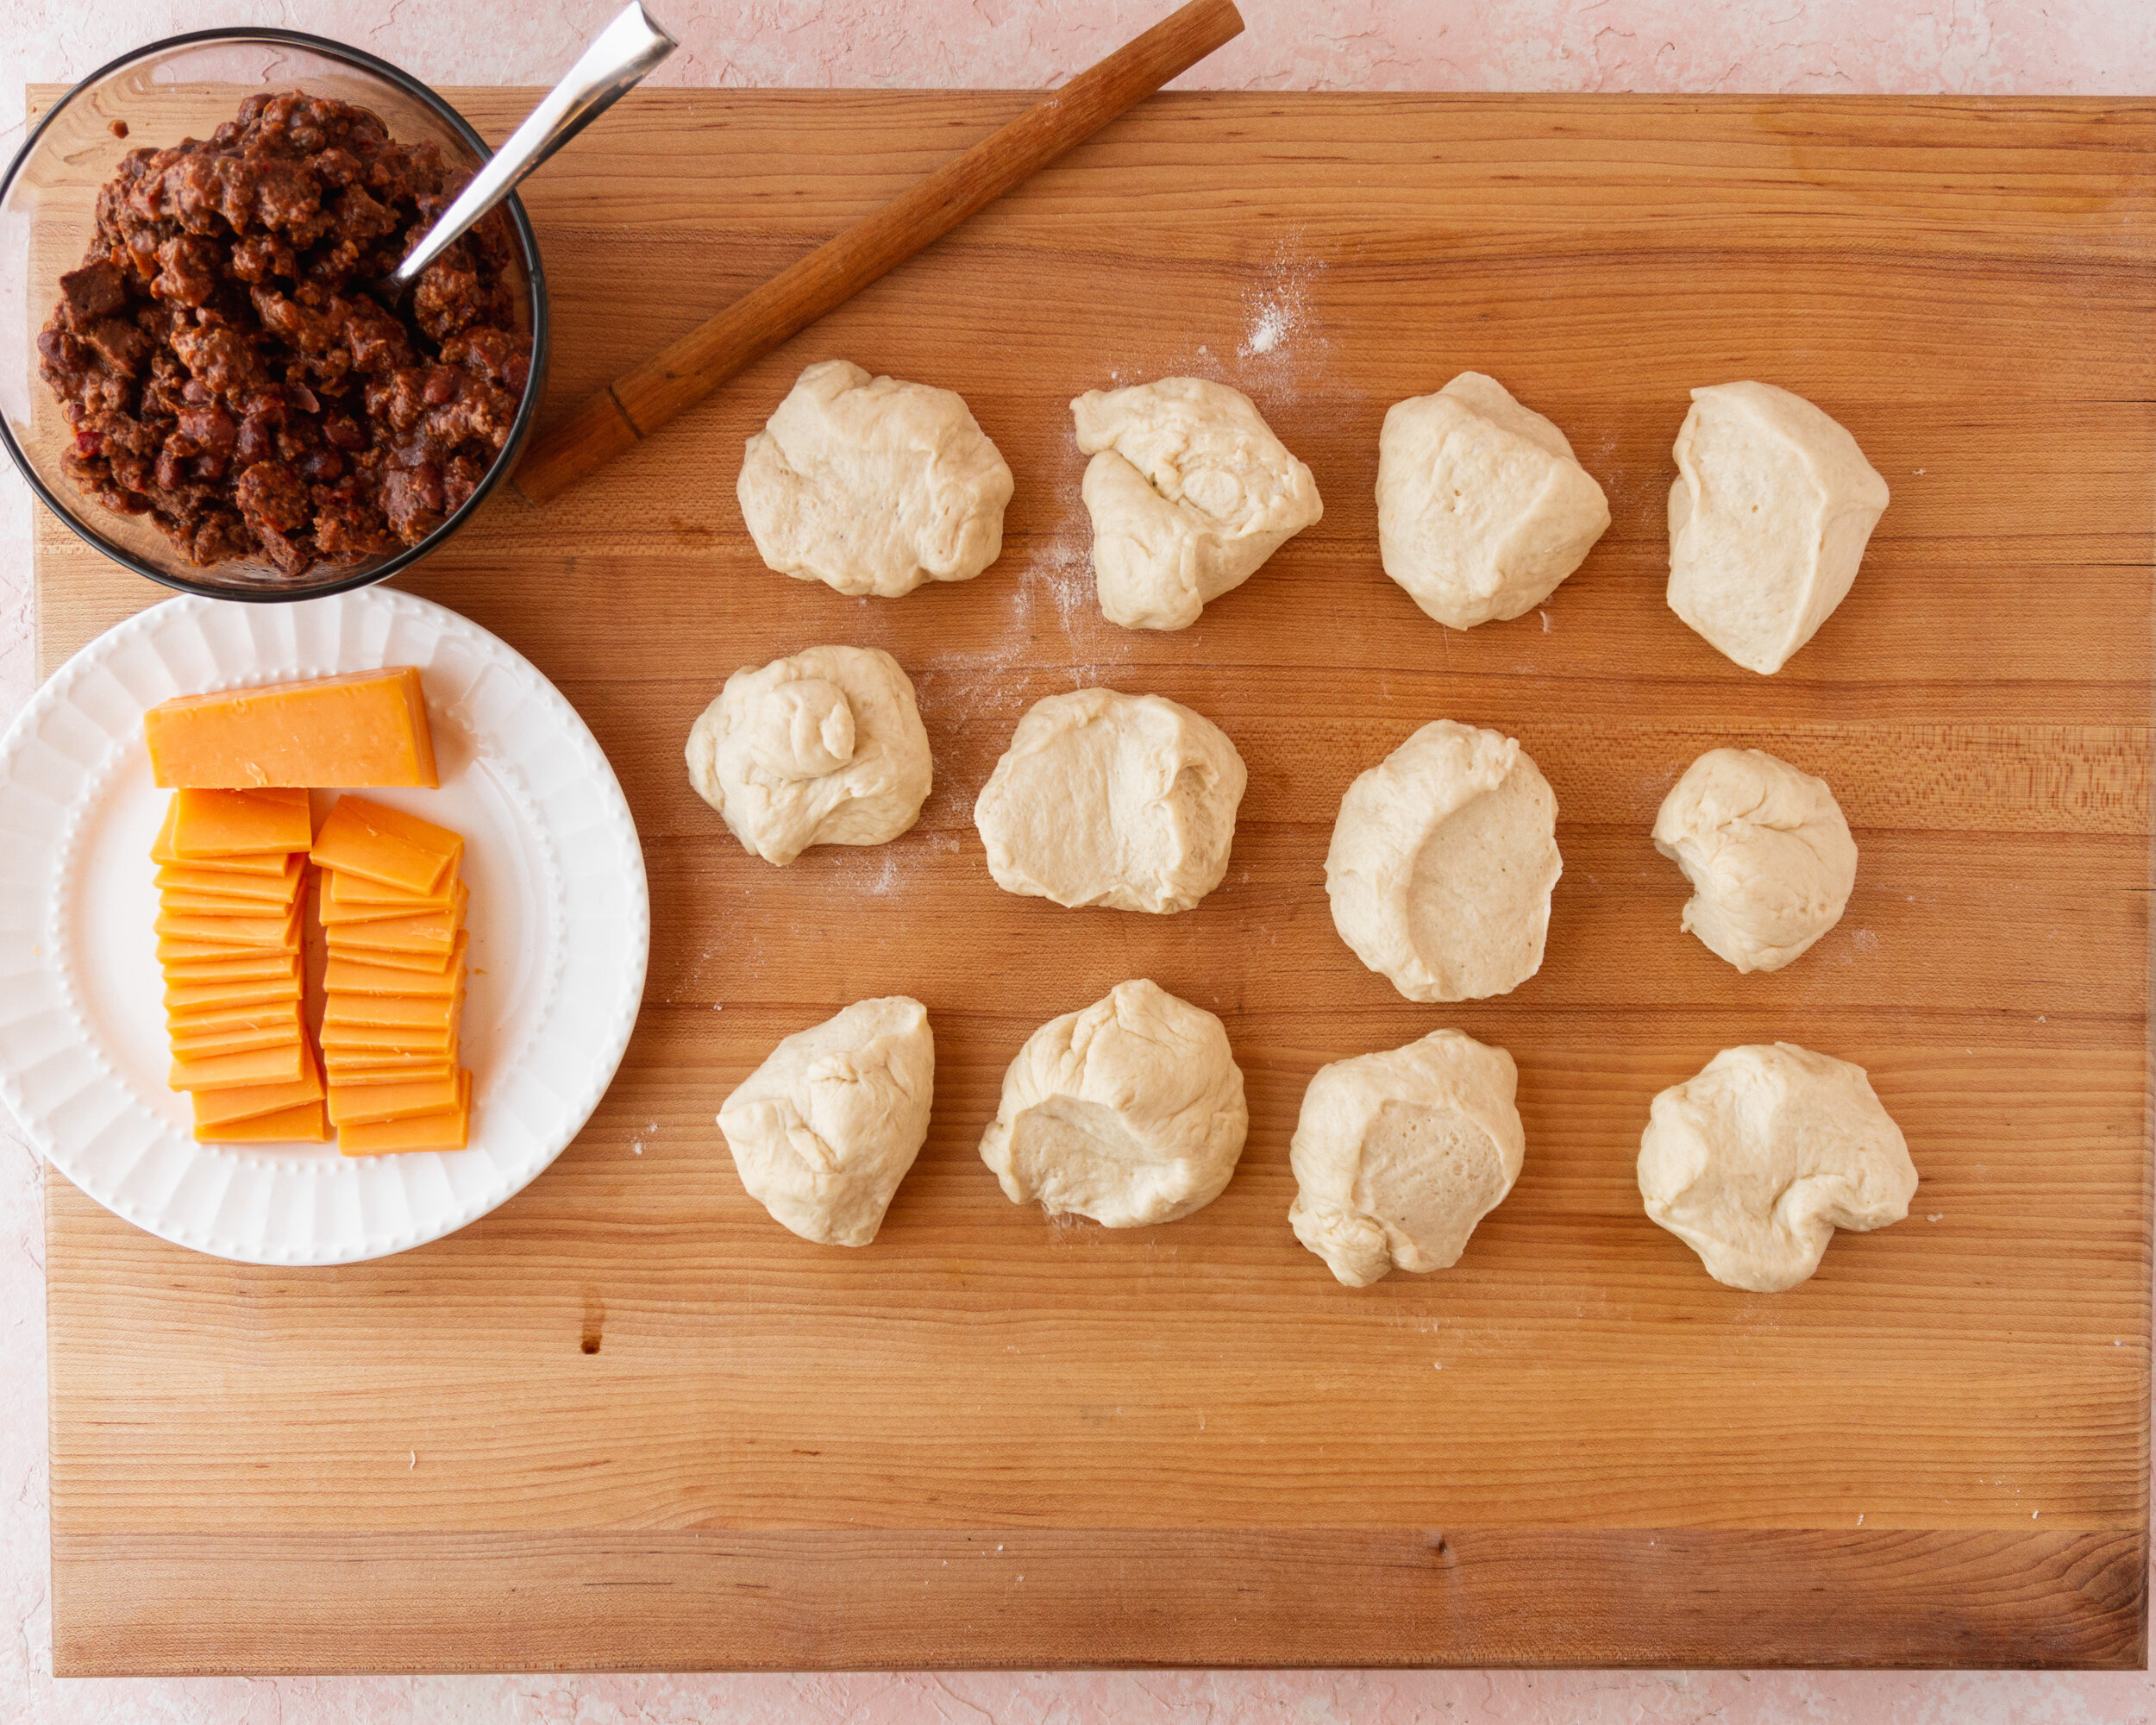
Line a baking sheet with parchment paper or a lightly greased aluminum foil. Transfer the the dough onto a clean work surface, lightly floured if you’d like (🎩Flour Power). Divide the dough into 10-12 roughly equal pieces, 10 for big buns and 12 for smaller ones.
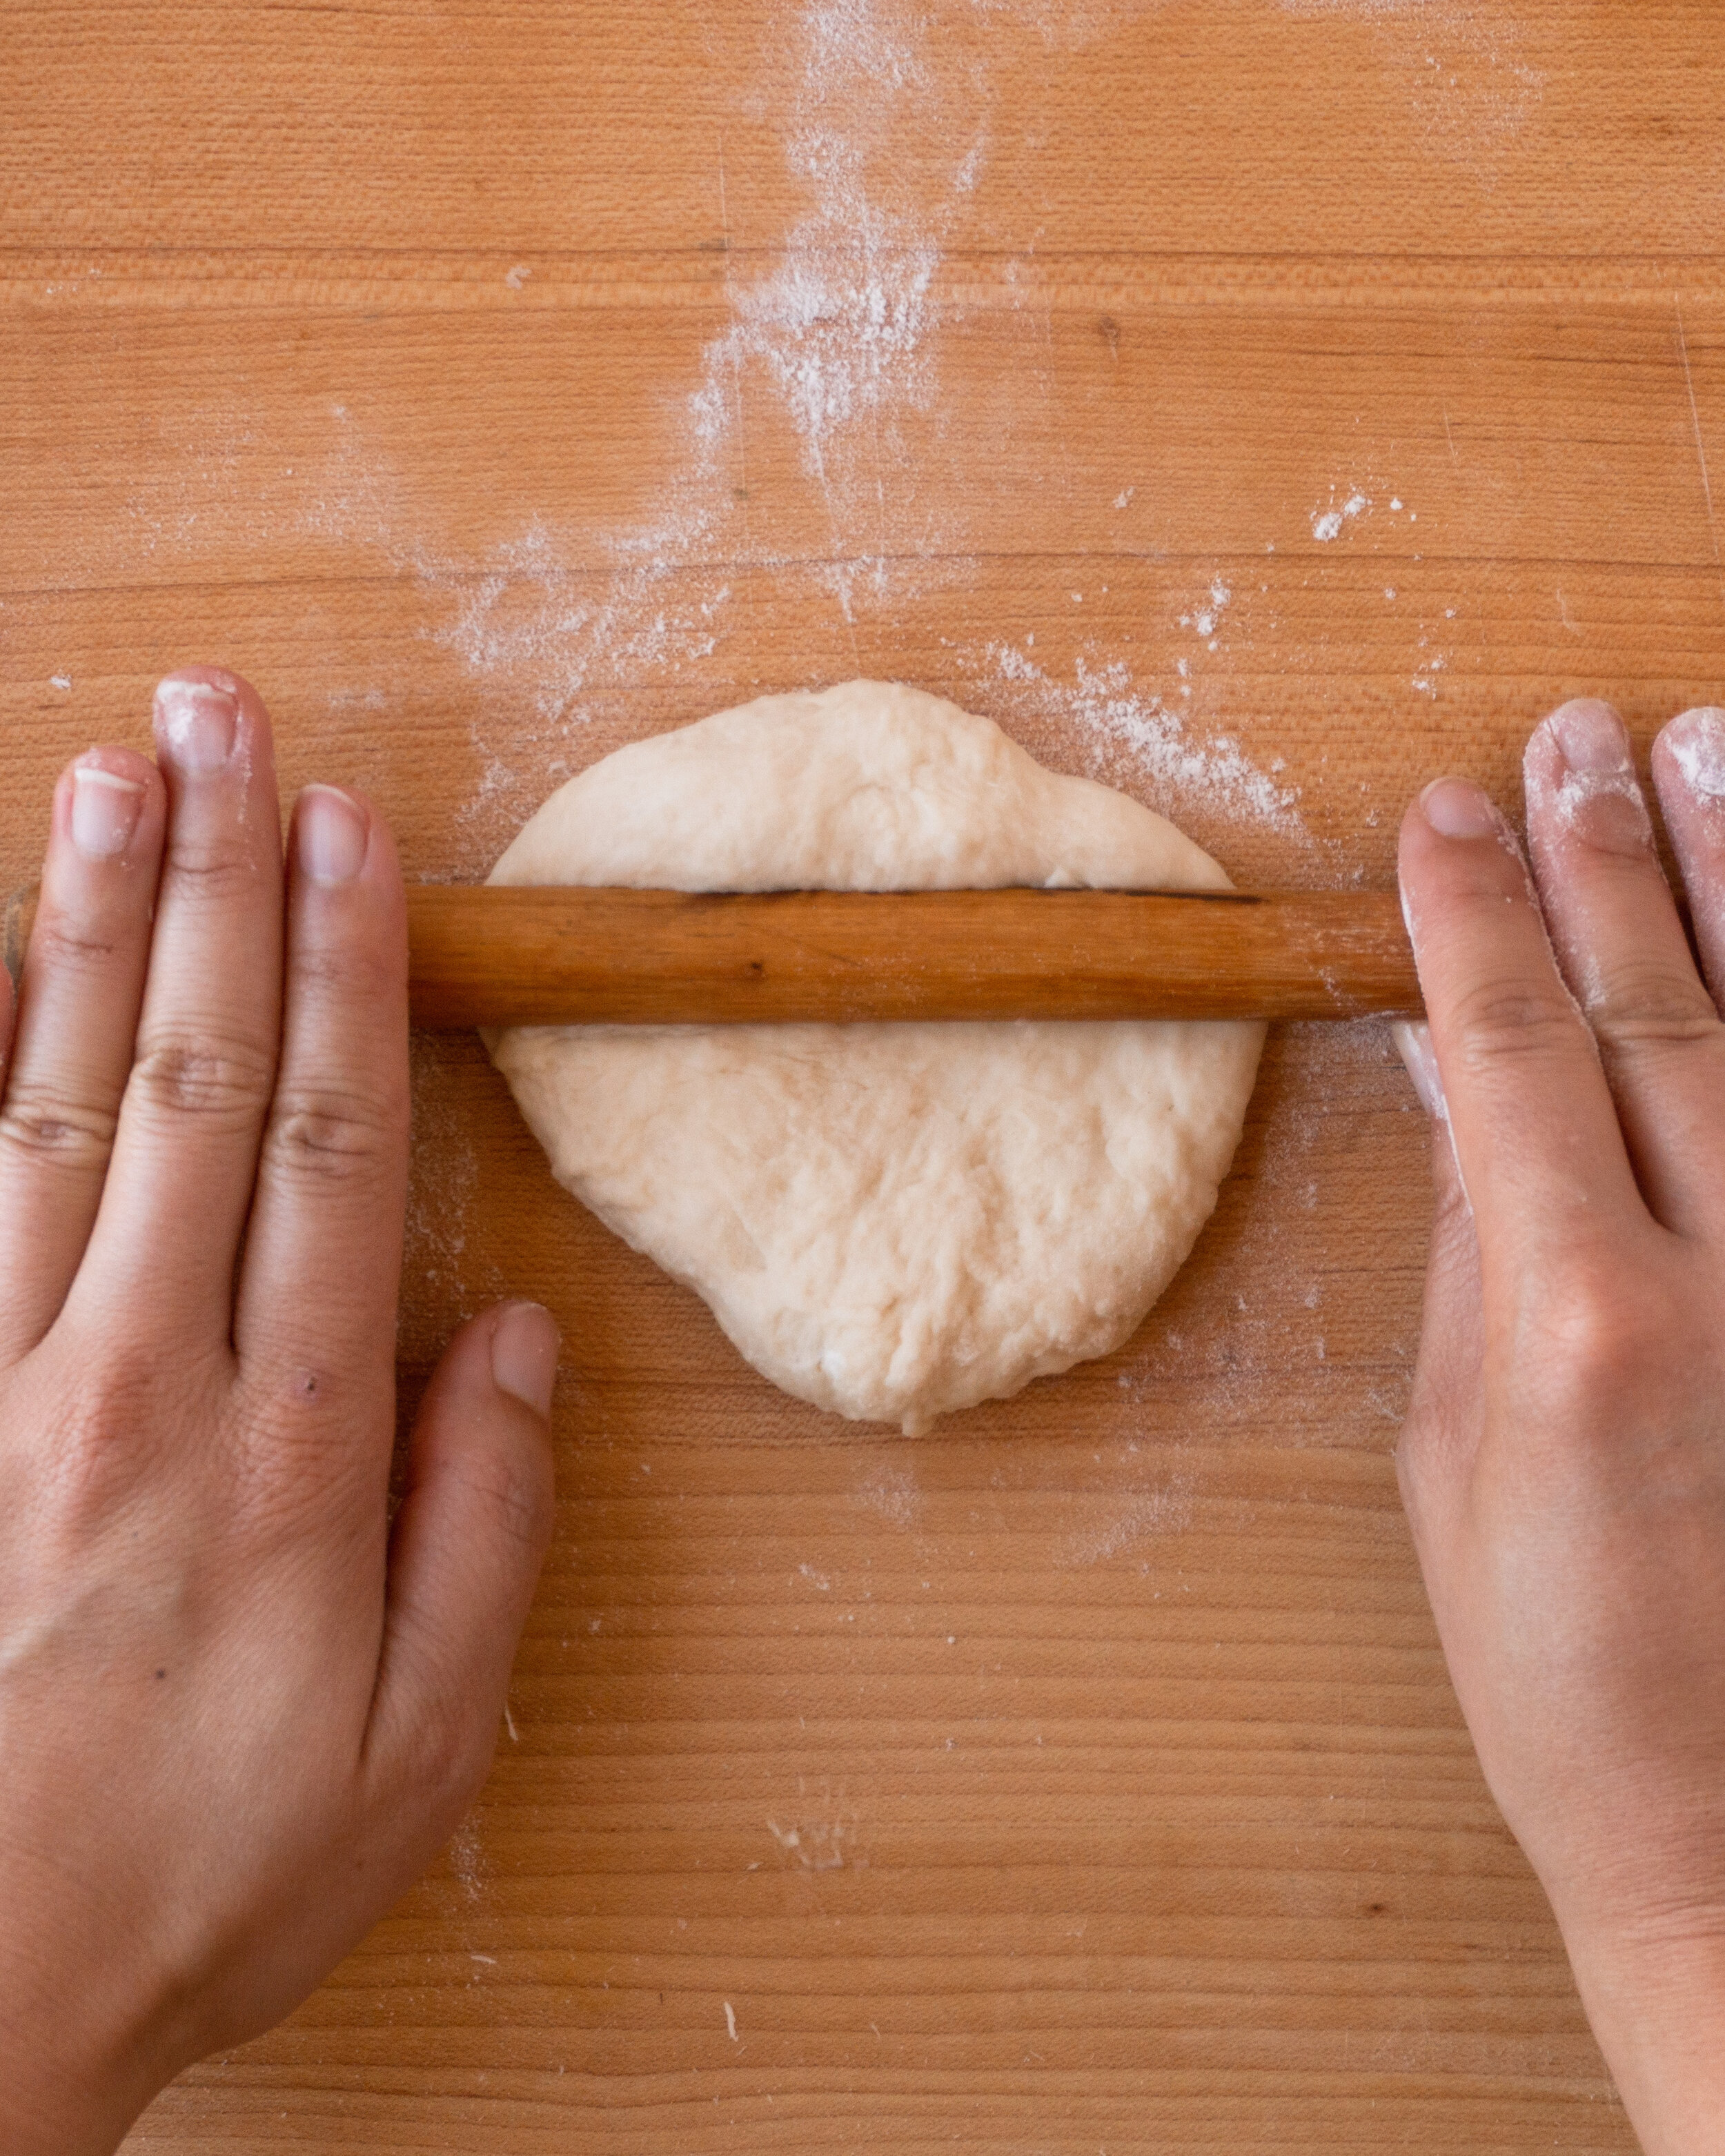
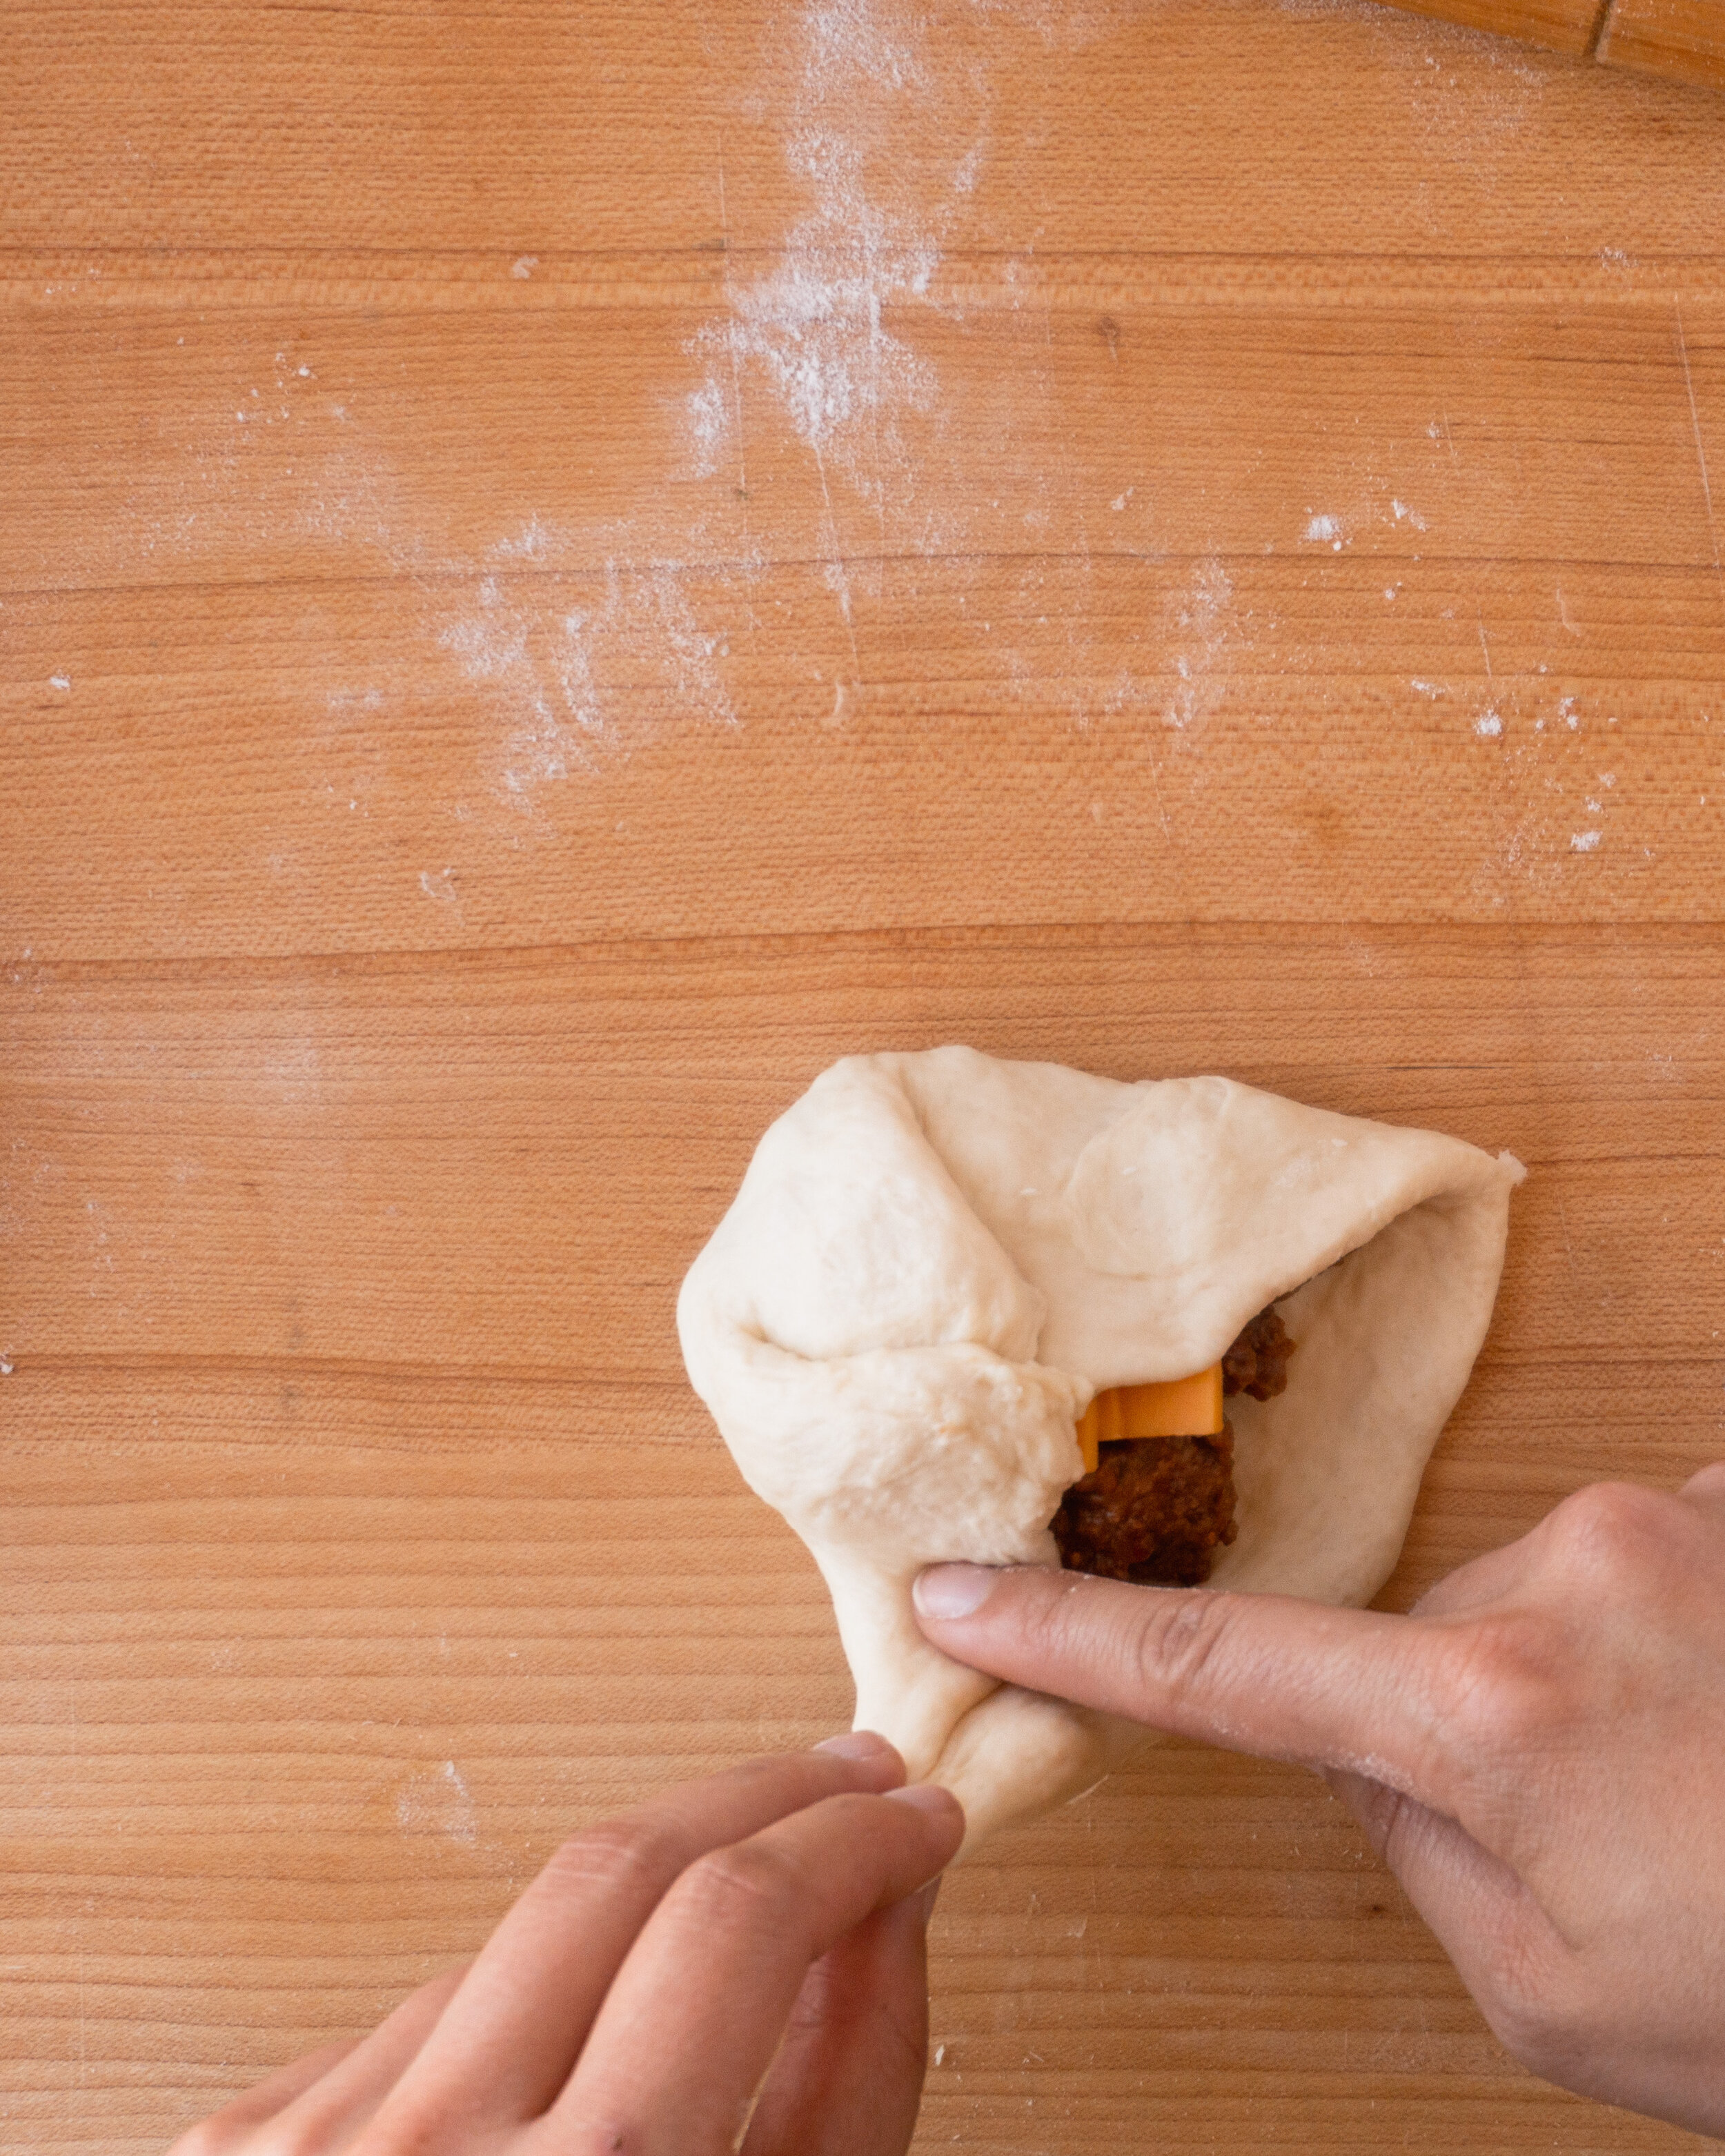
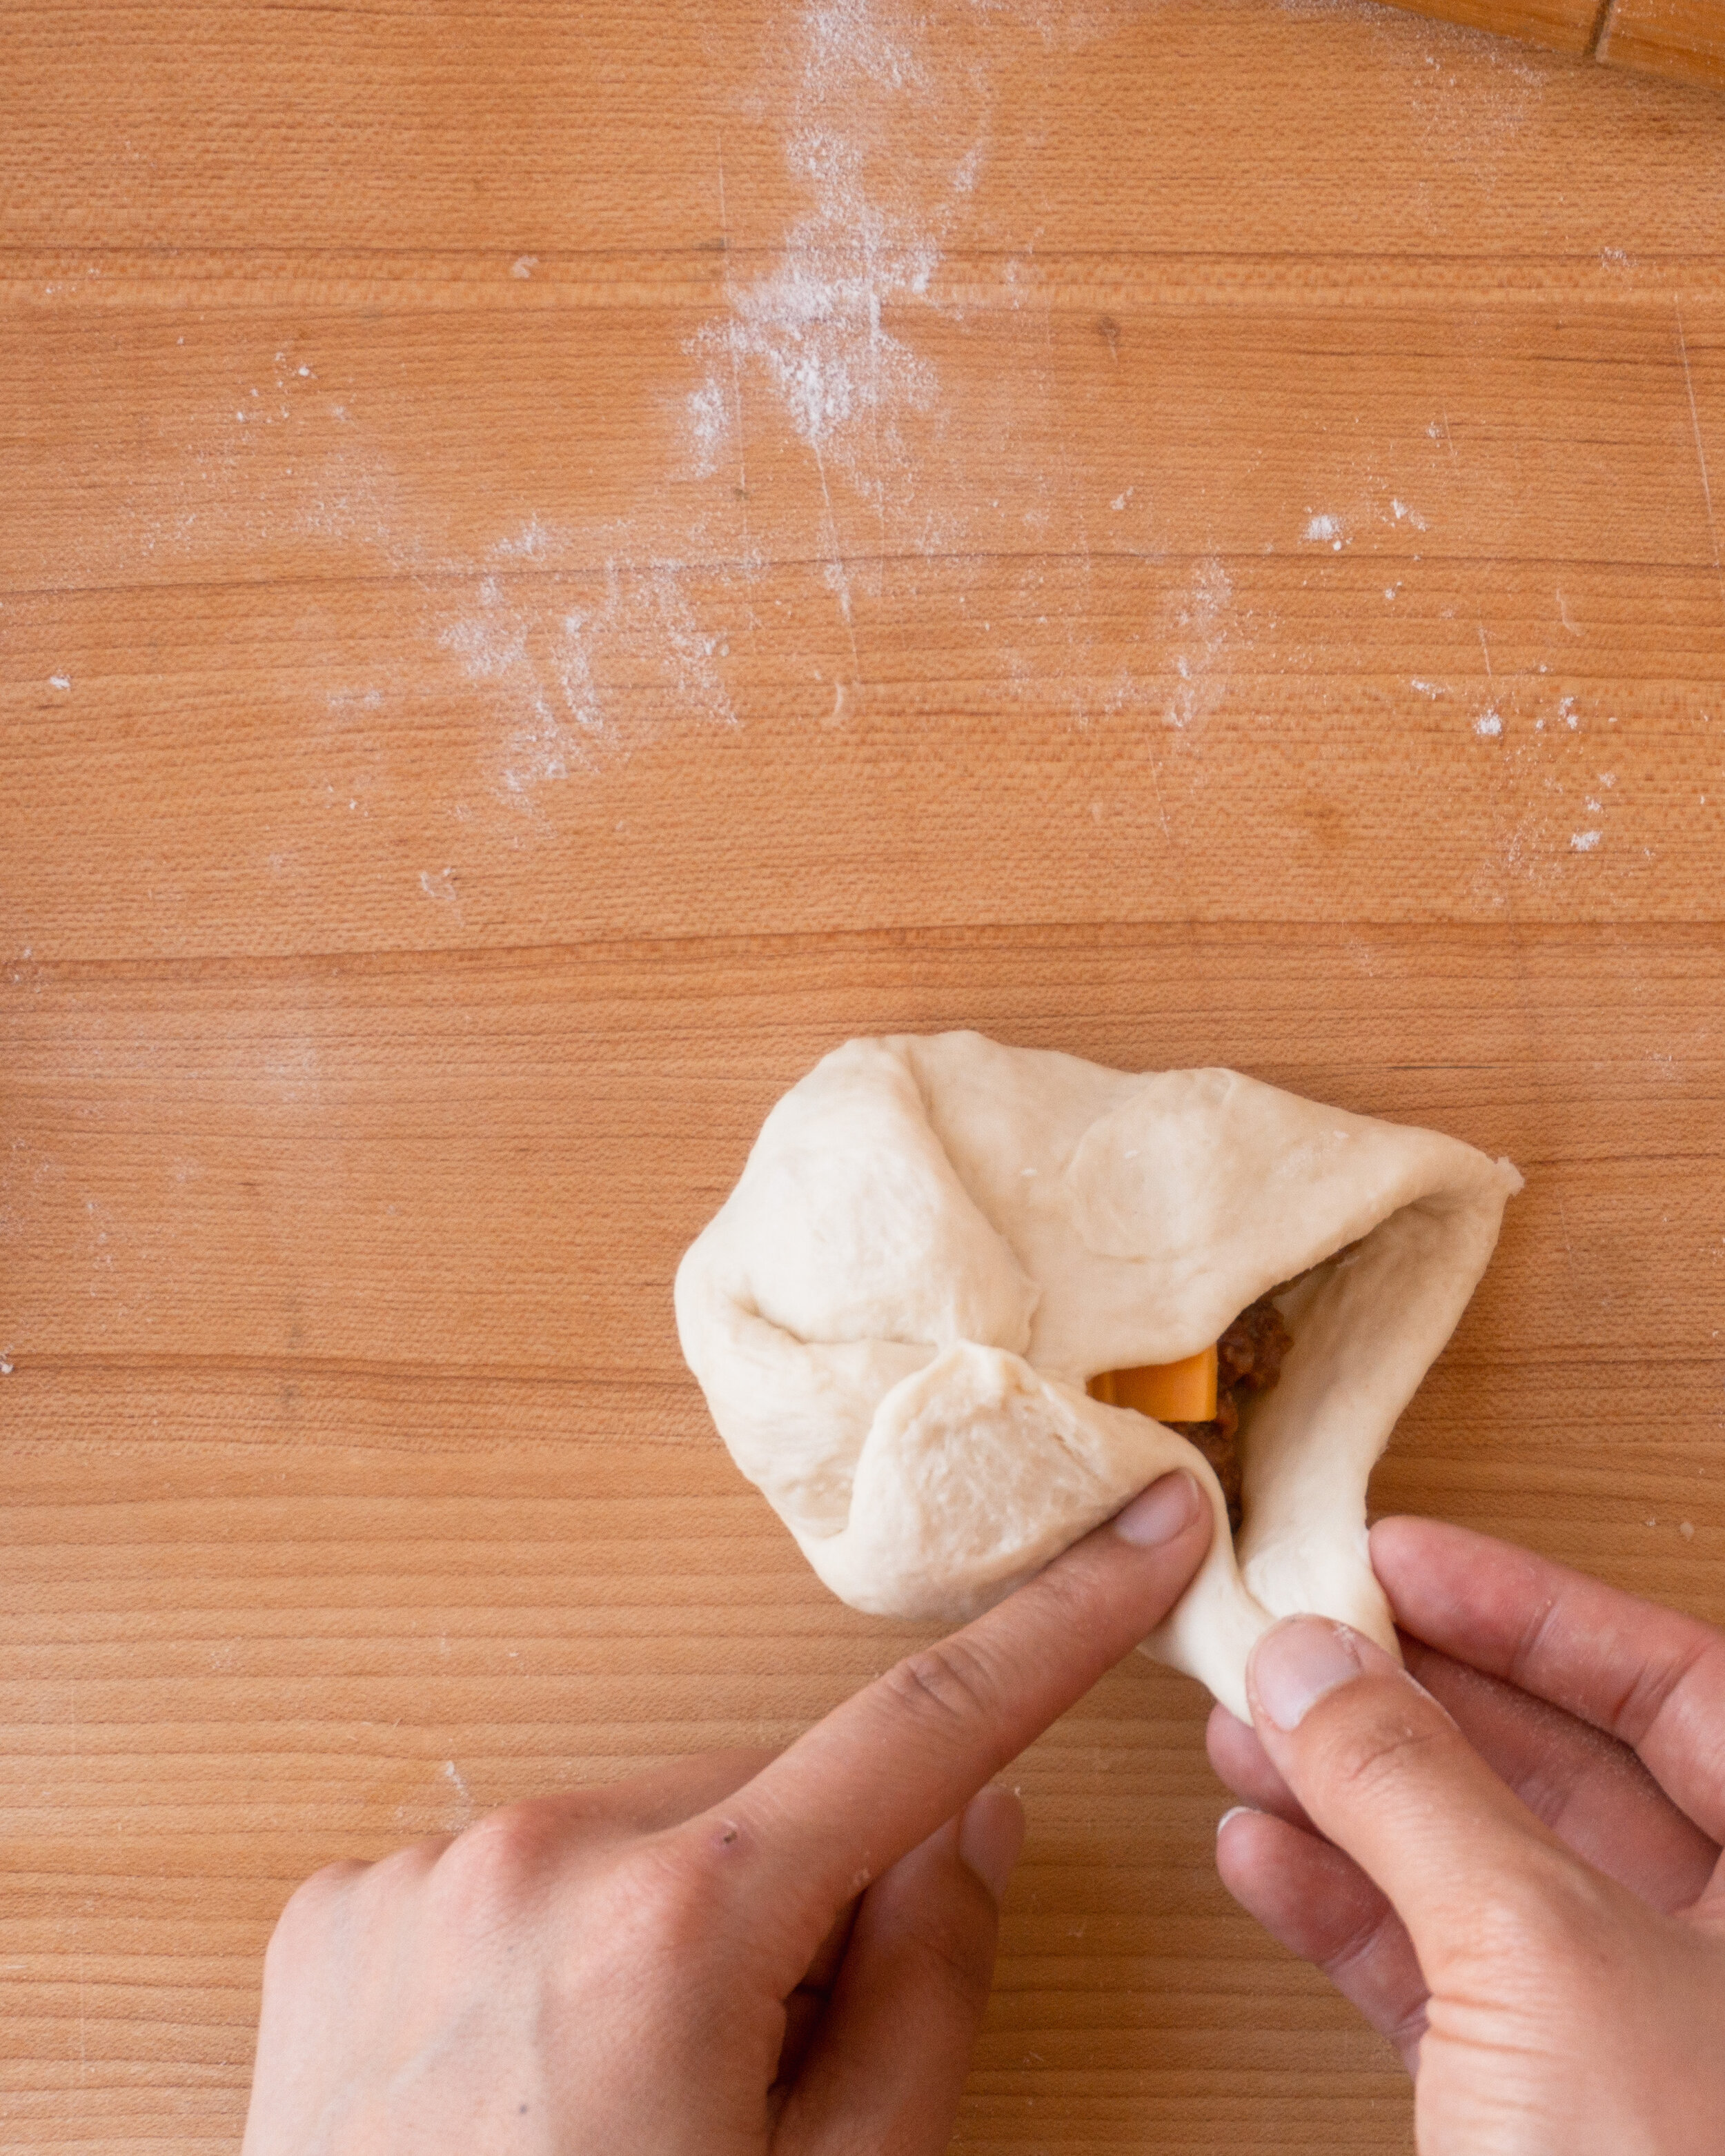
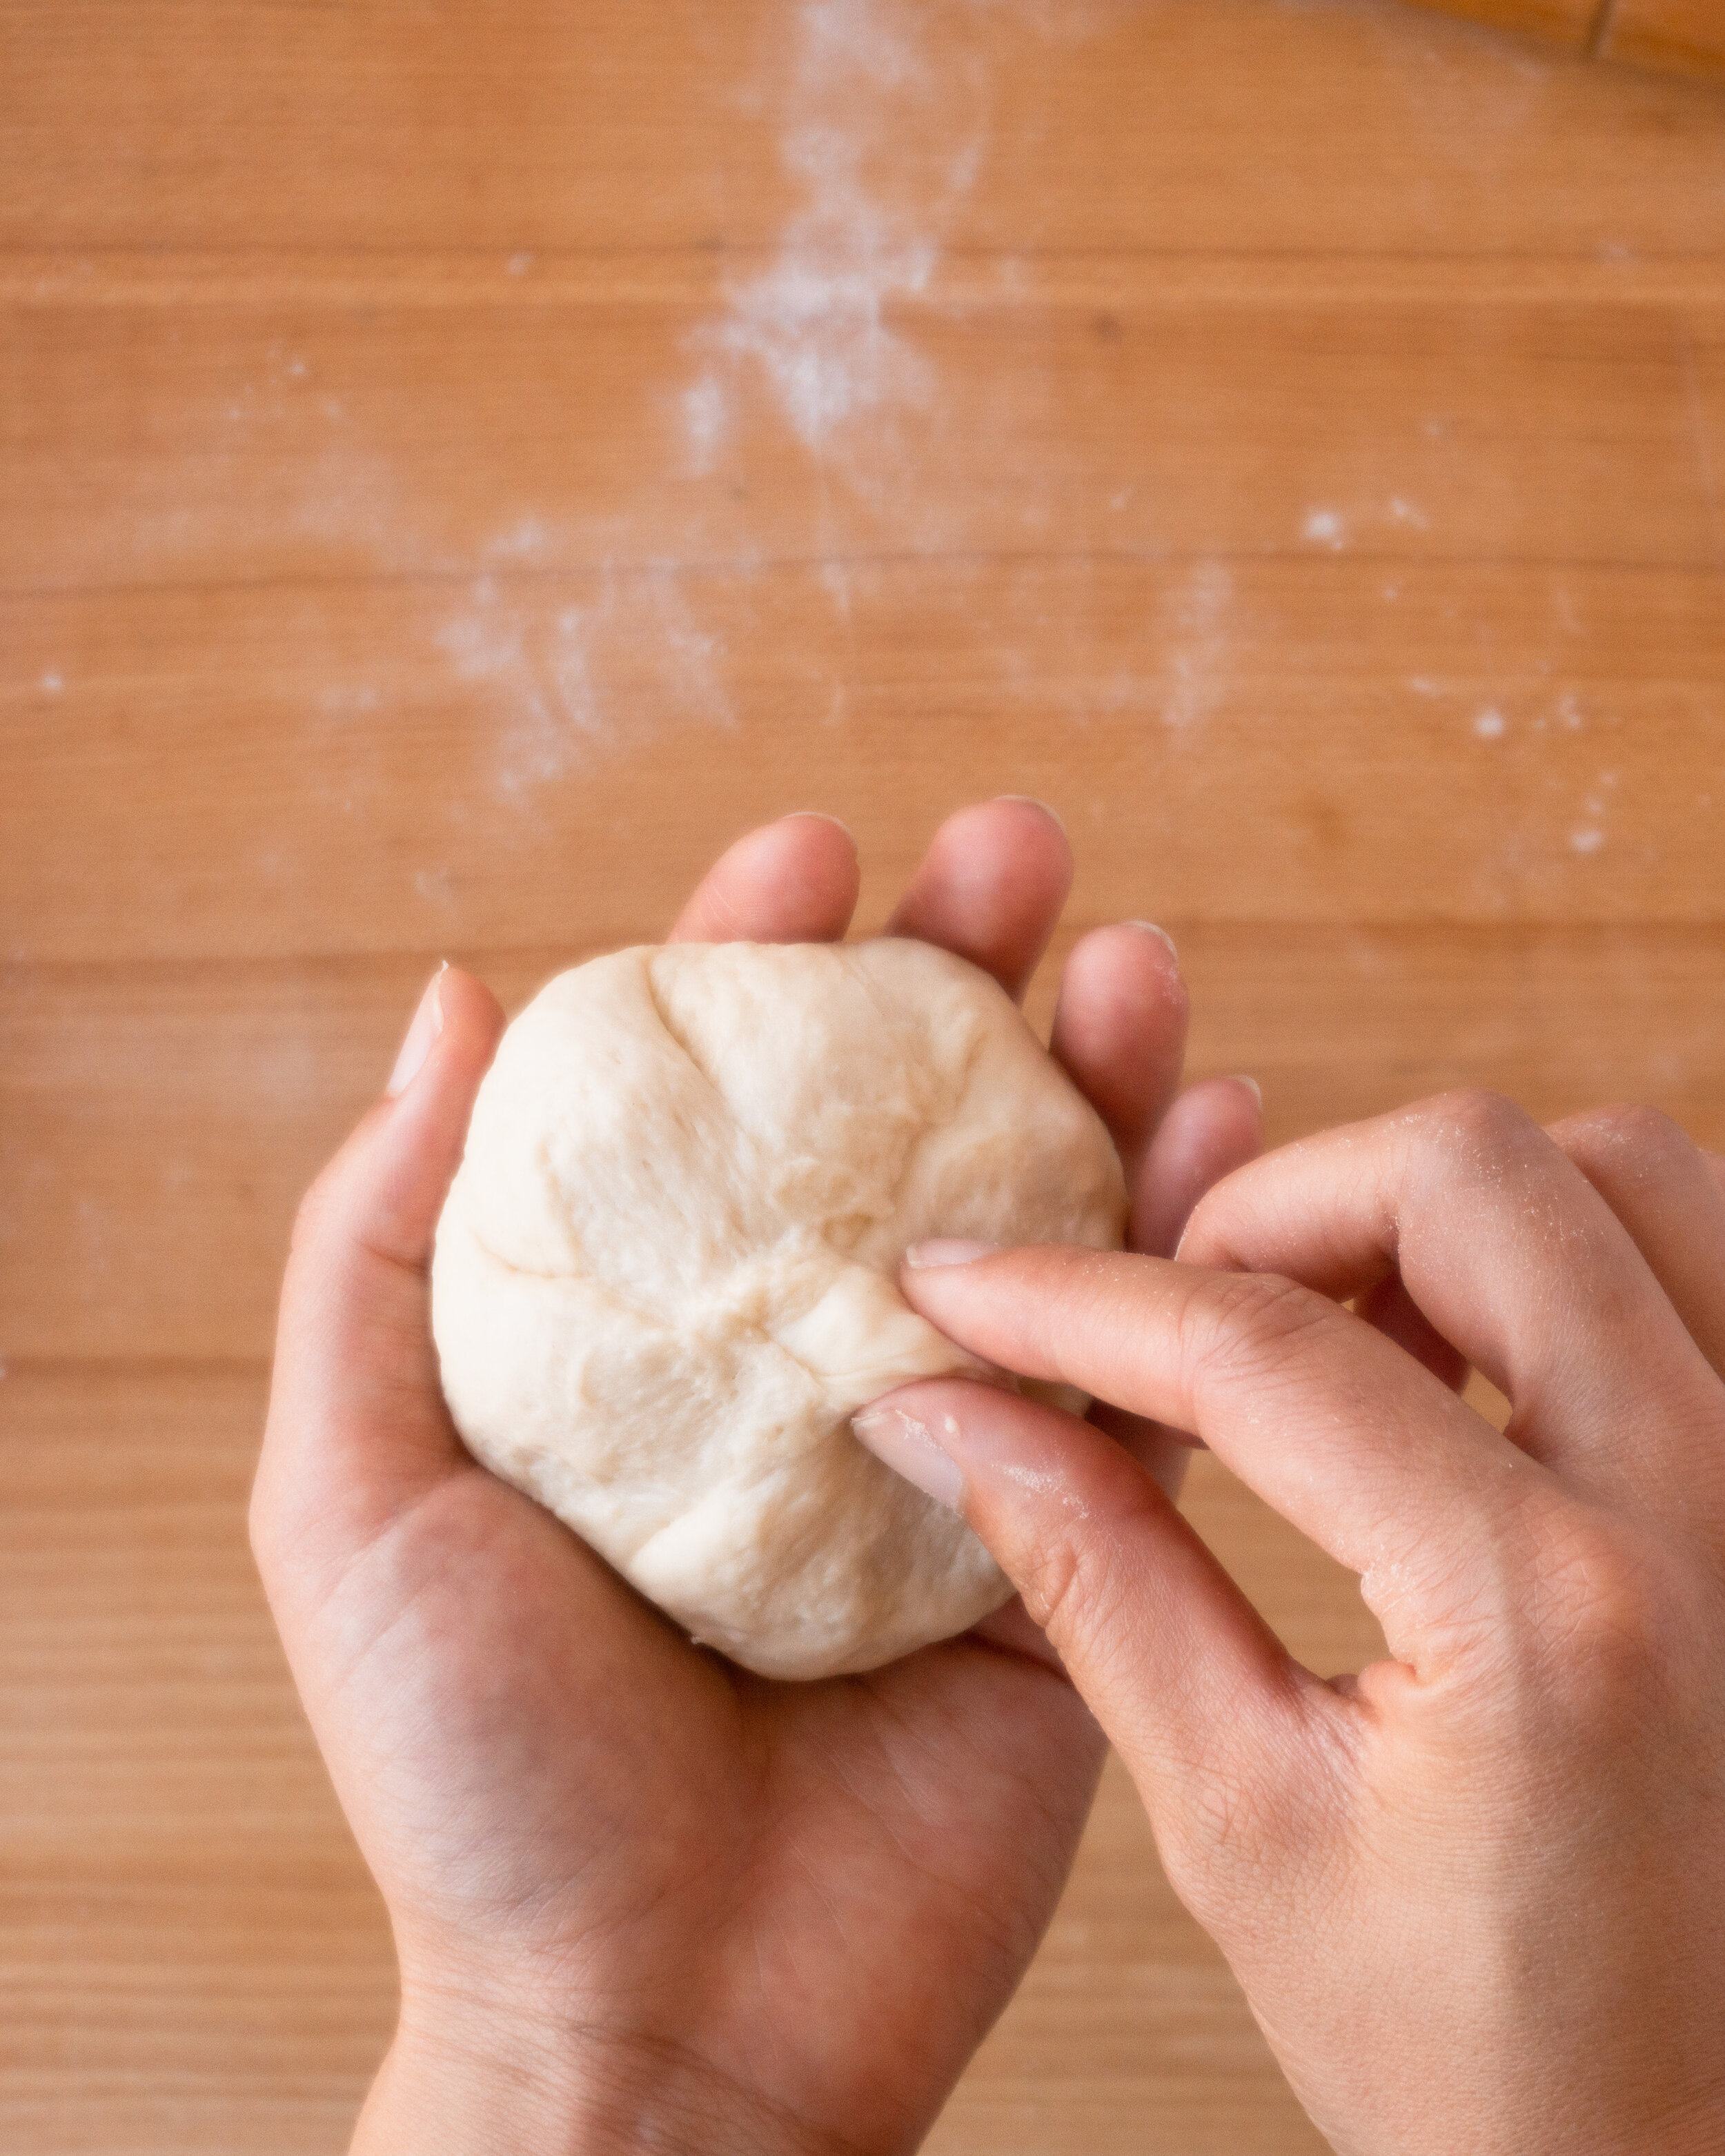
Take a piece of dough and fold the edges into the center , continuing to fold the dough into itself until it forms a ball with some resistance (🎩 Toughen Up). Place the dough ball on your work surface, then using a dowel or rolling pin, roll out the dough until it is at least 5 inches in diameter.
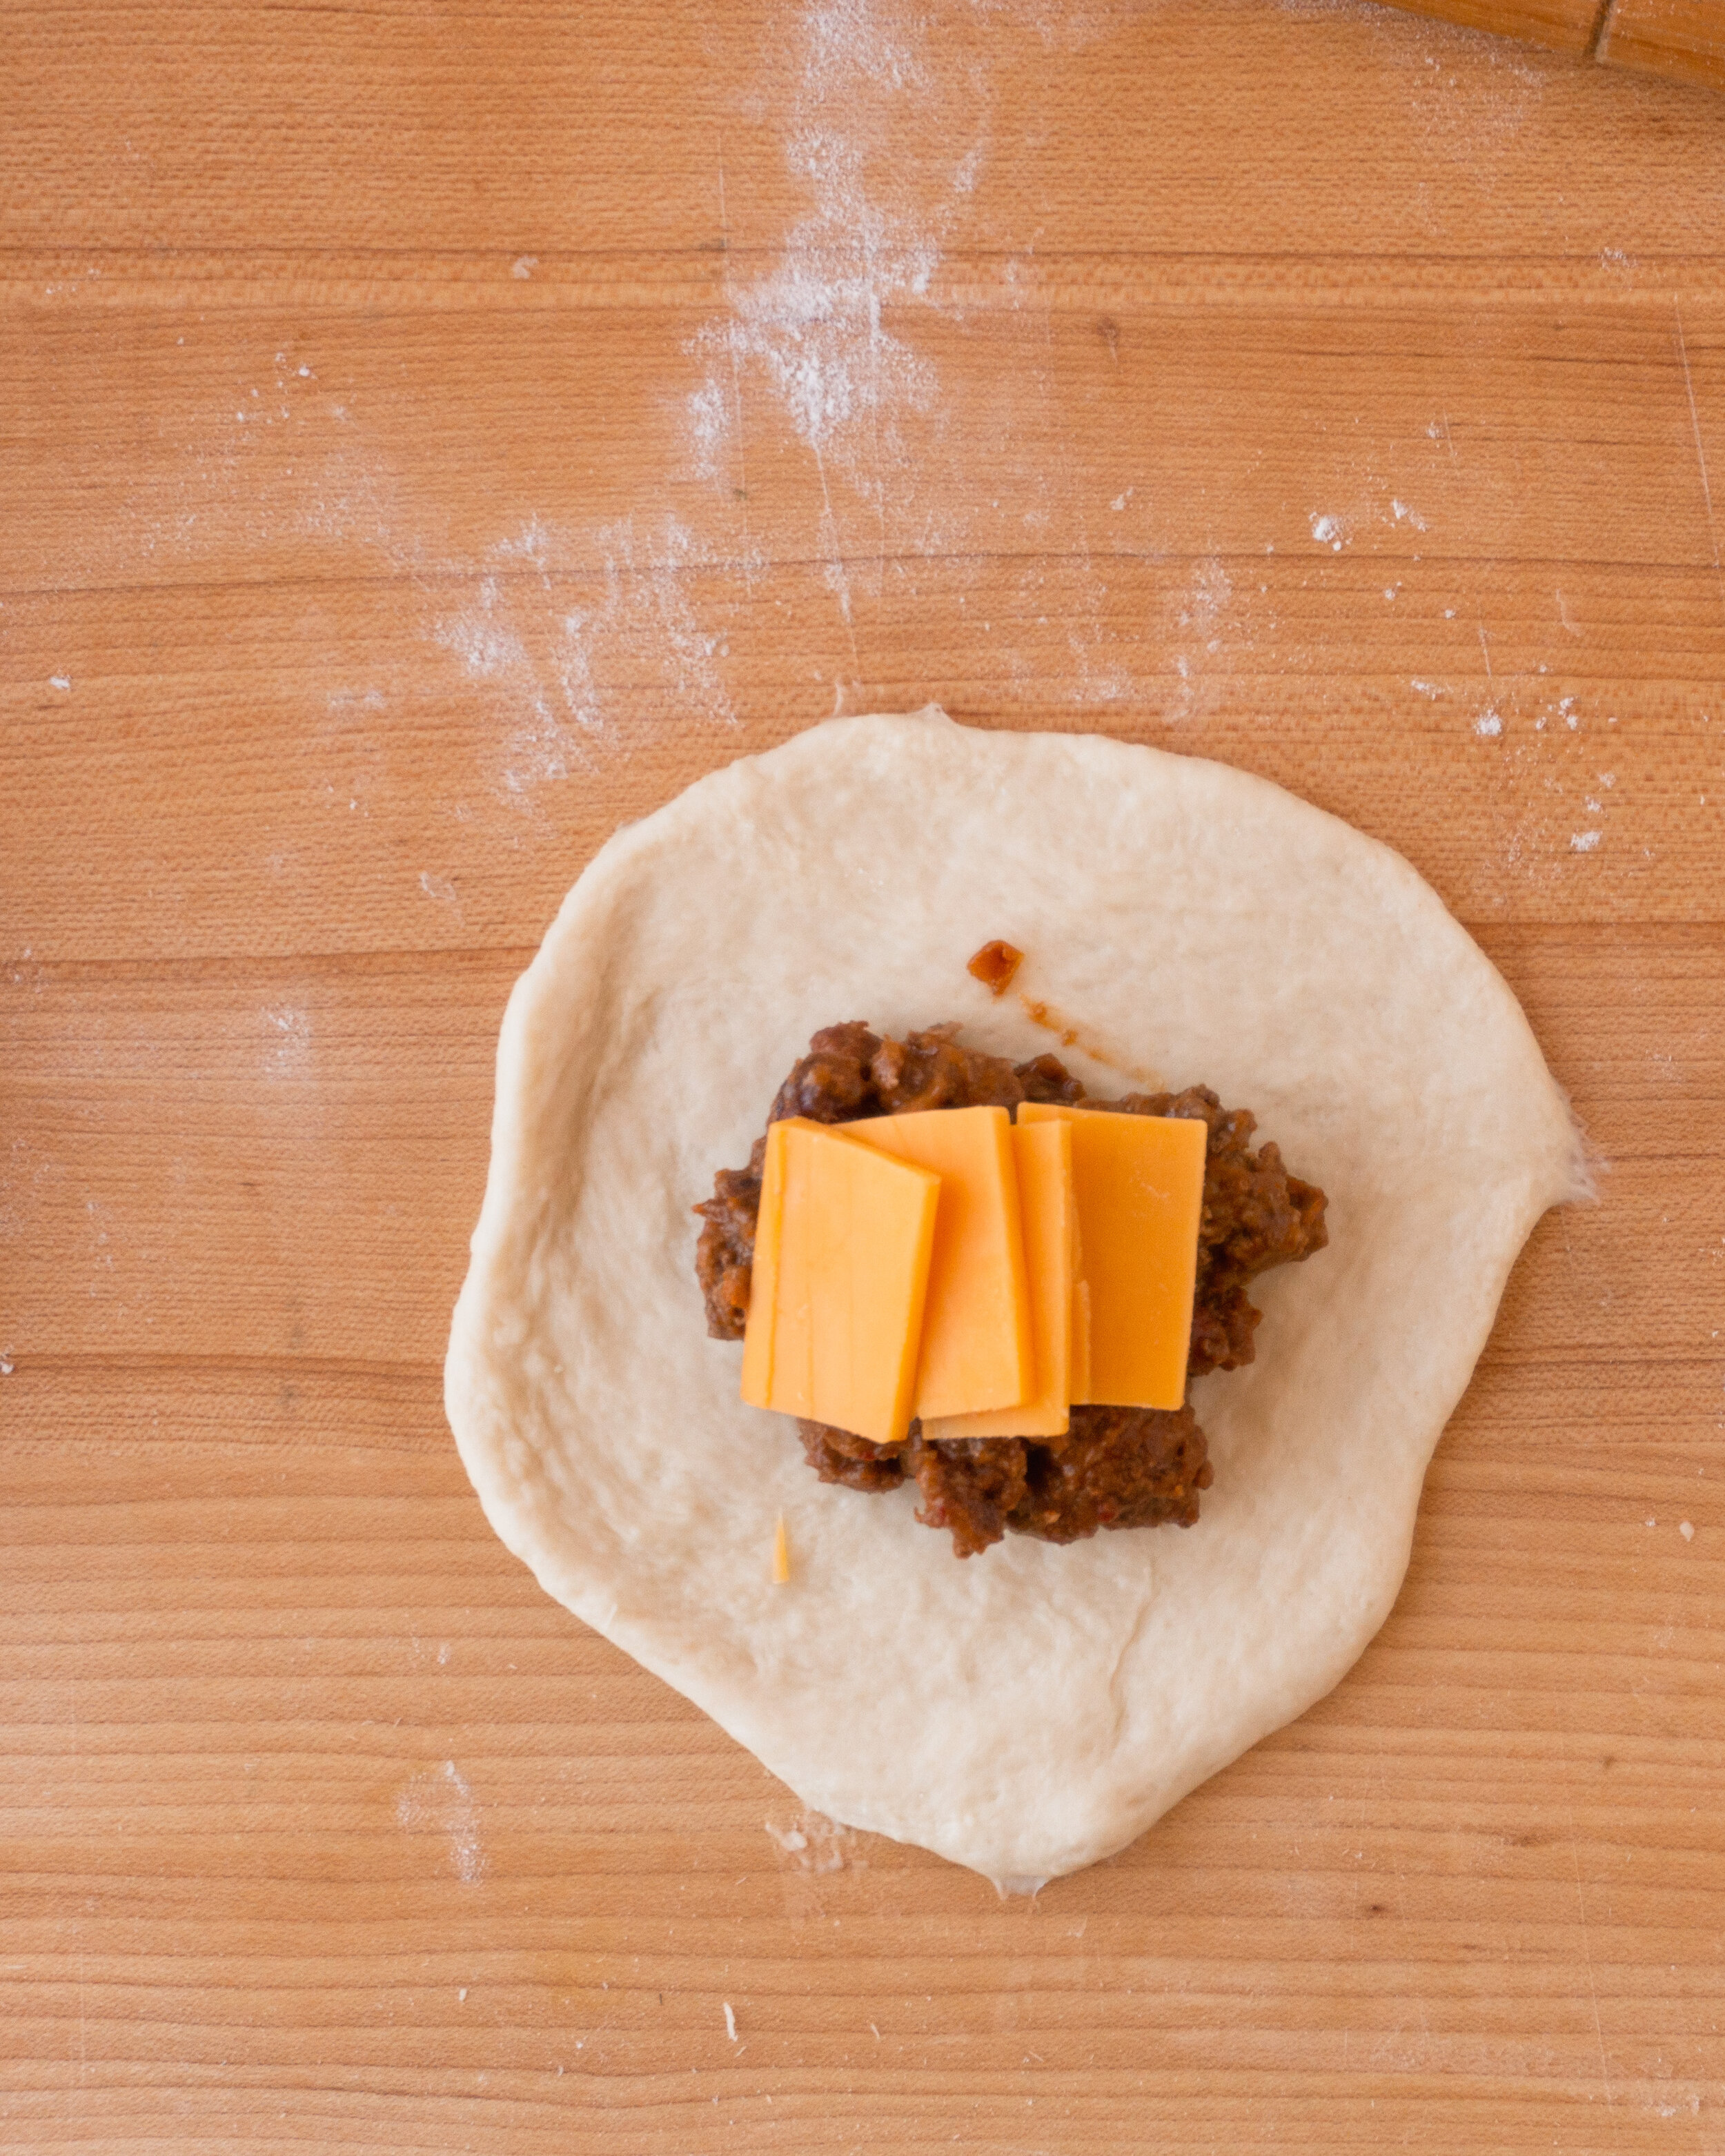
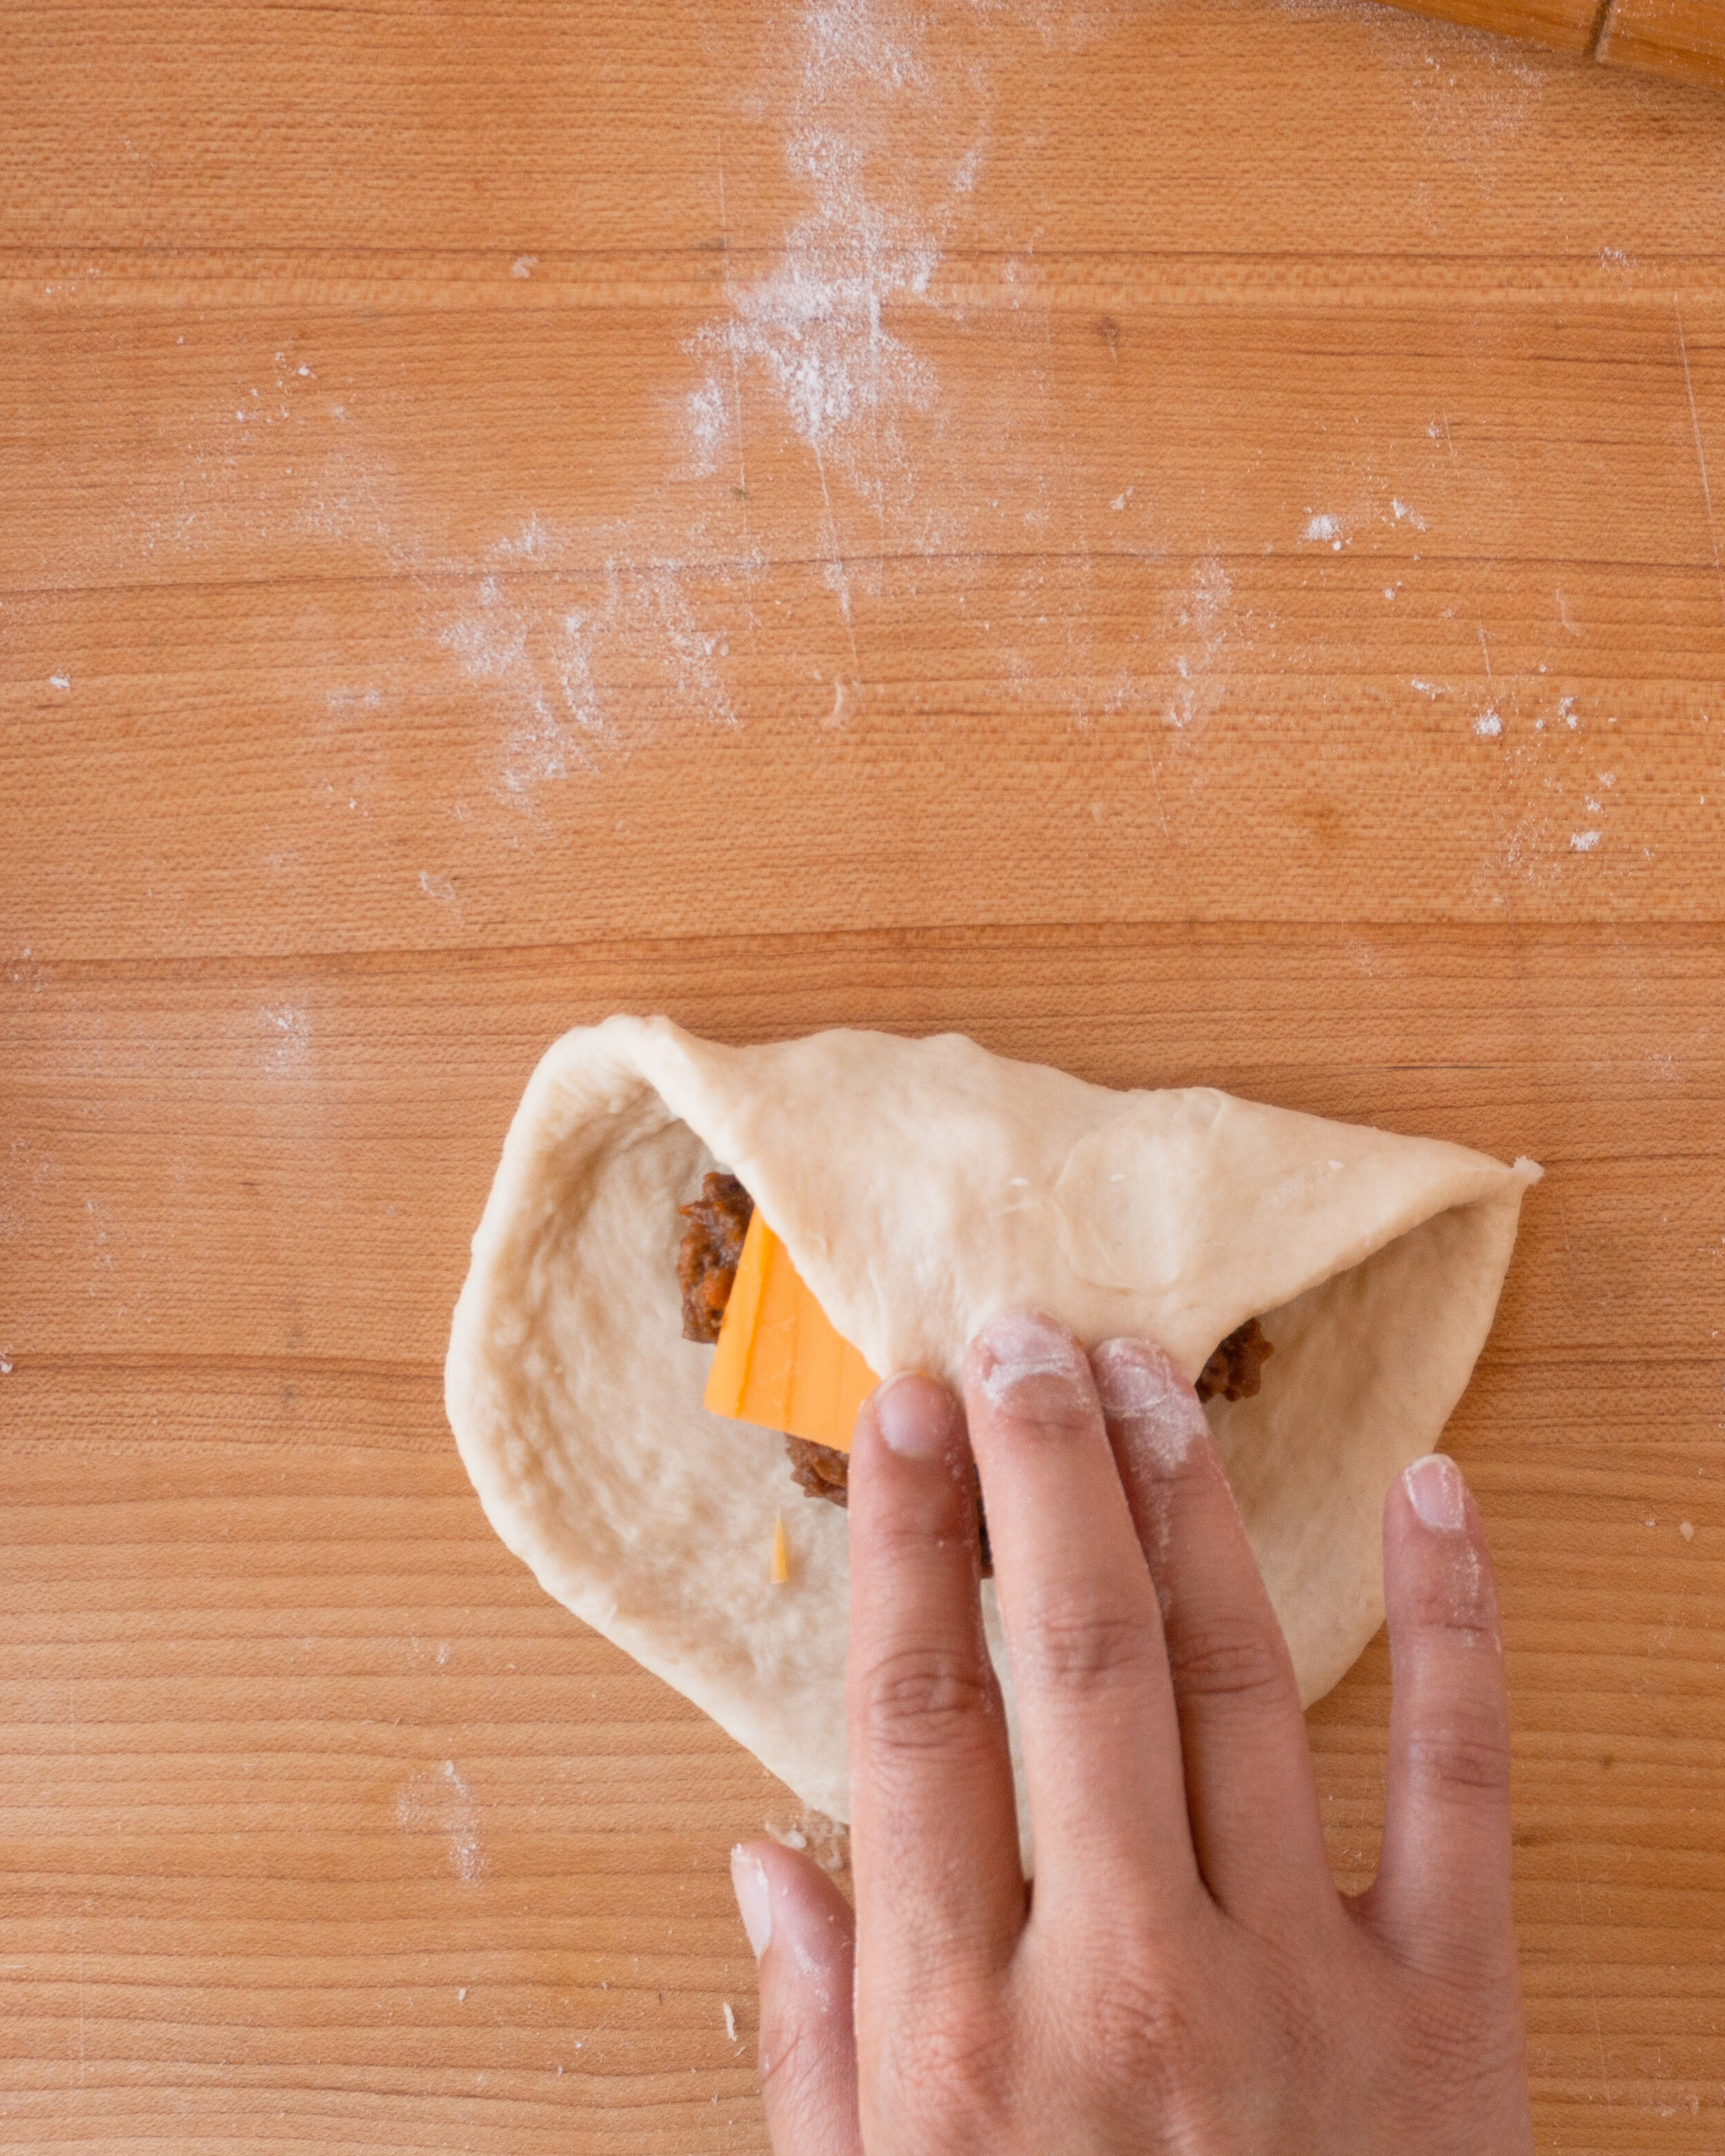
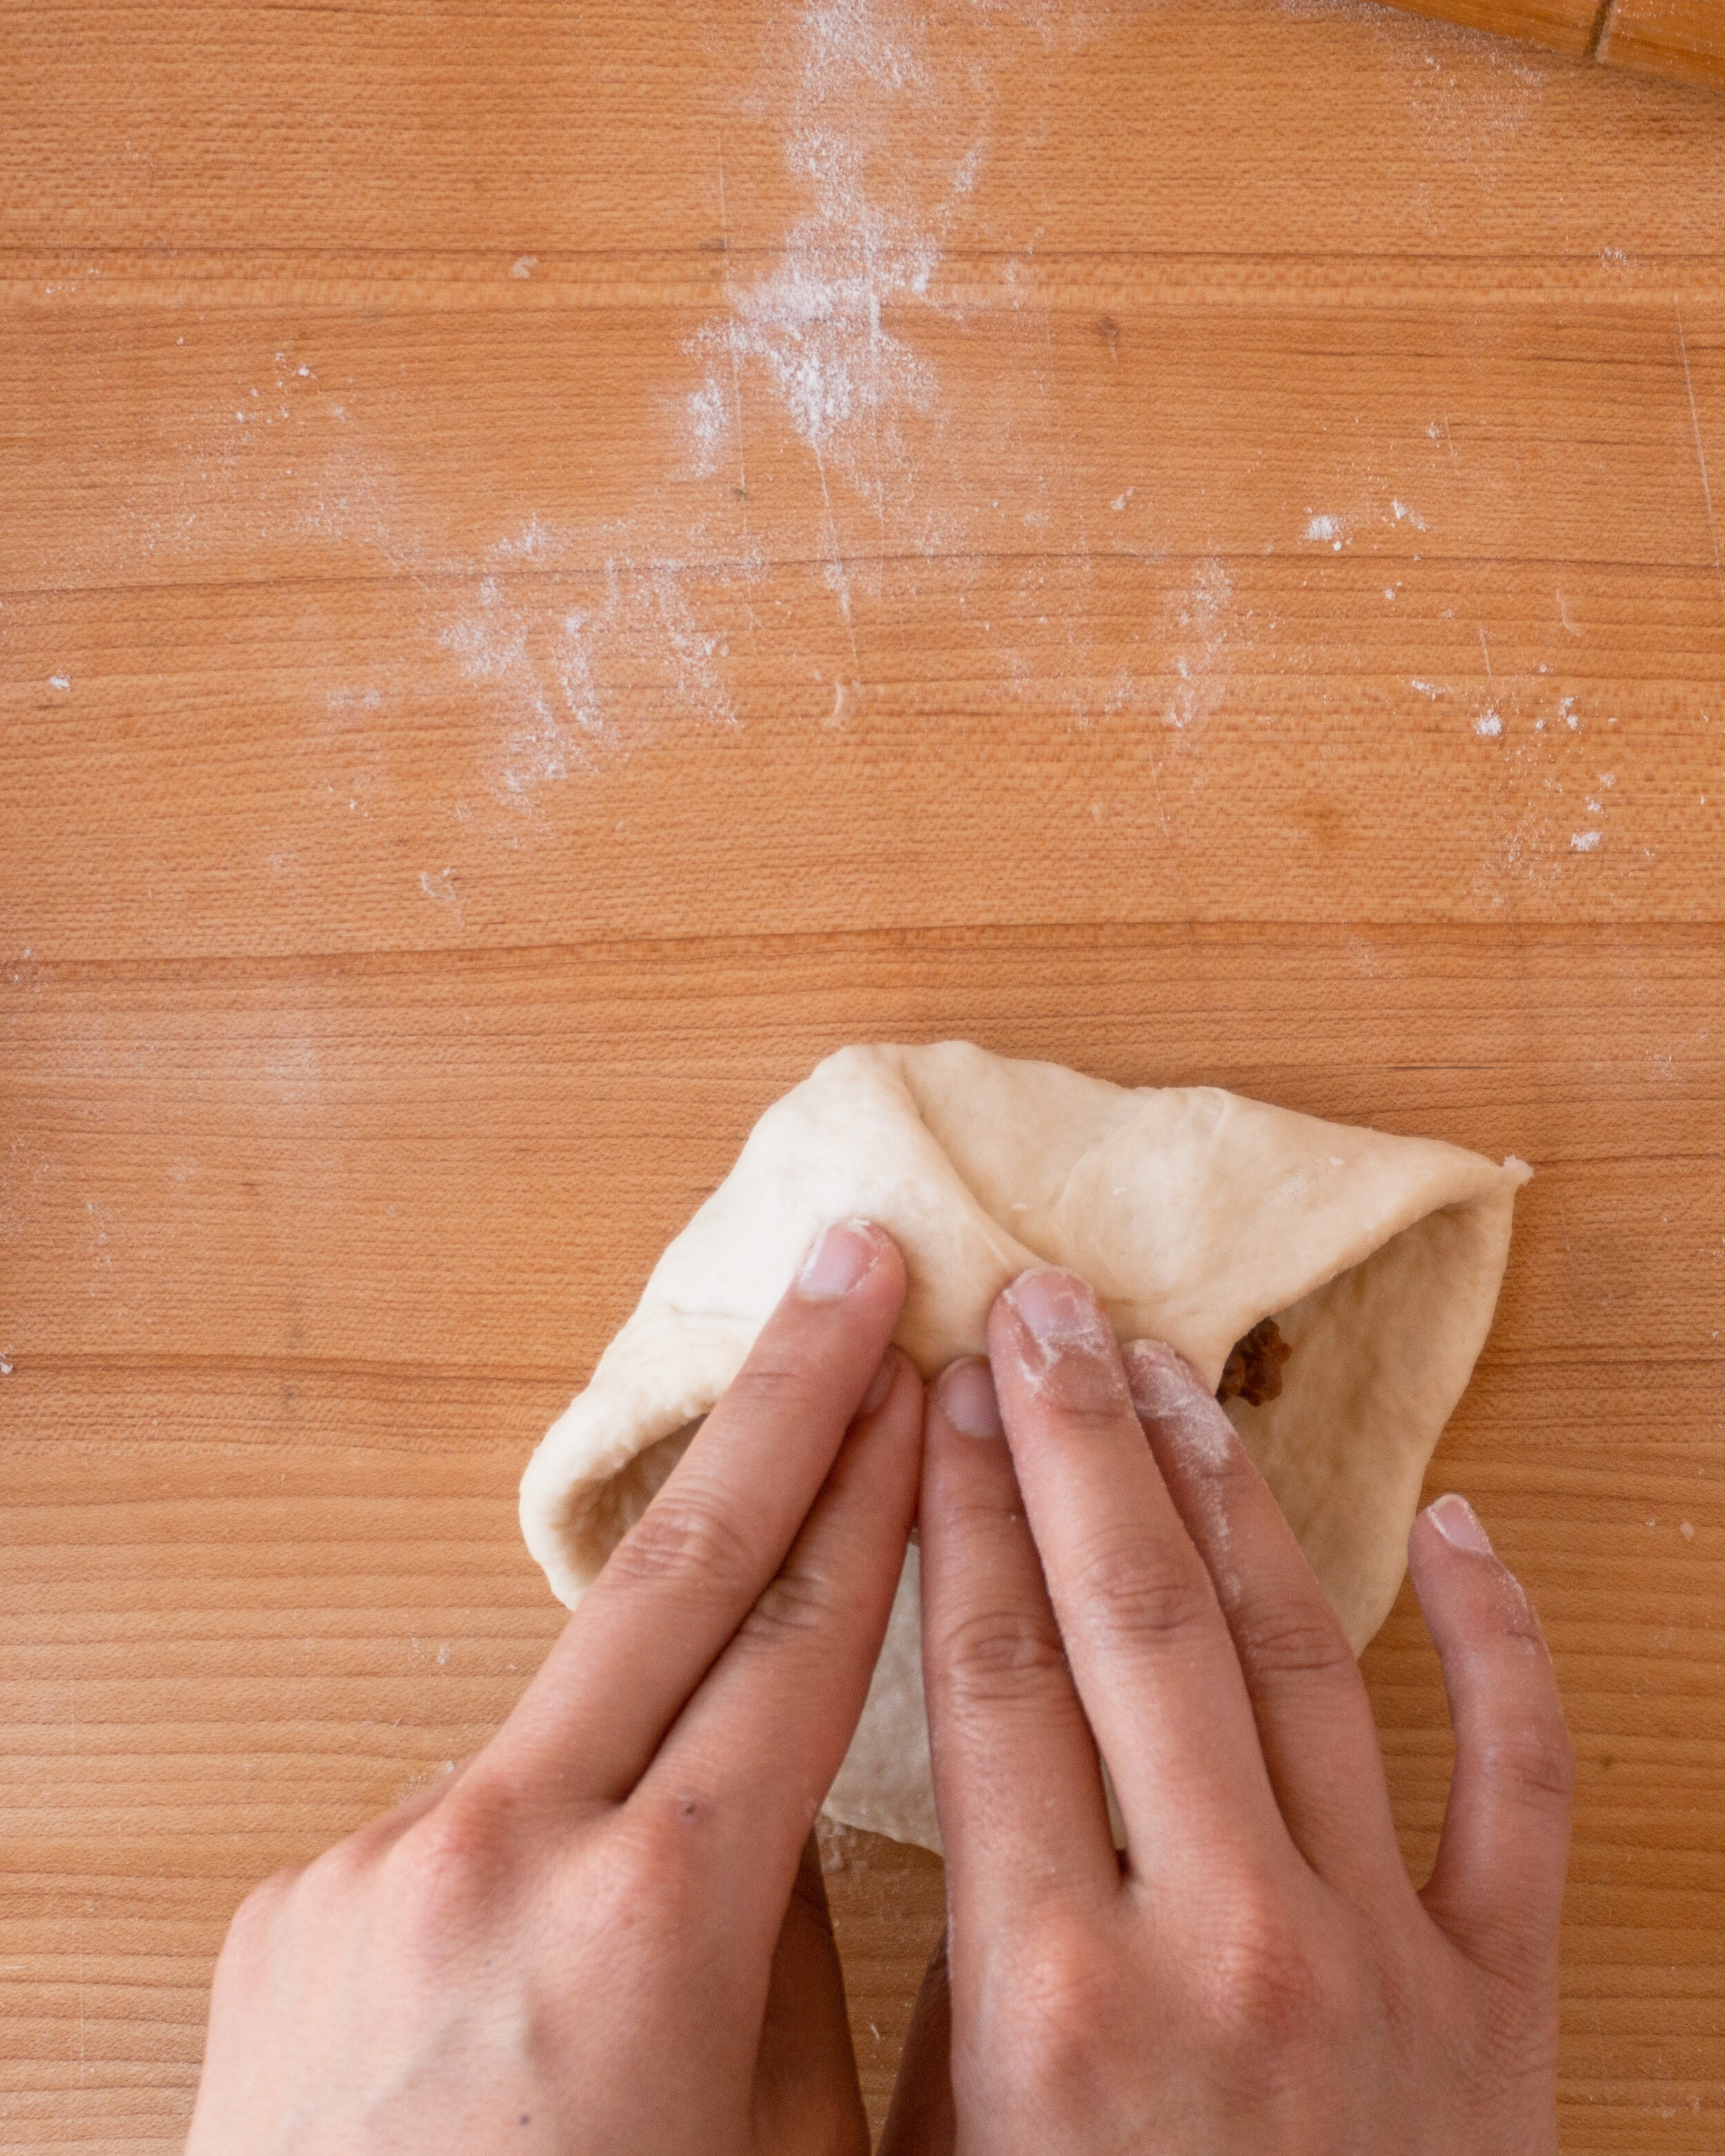
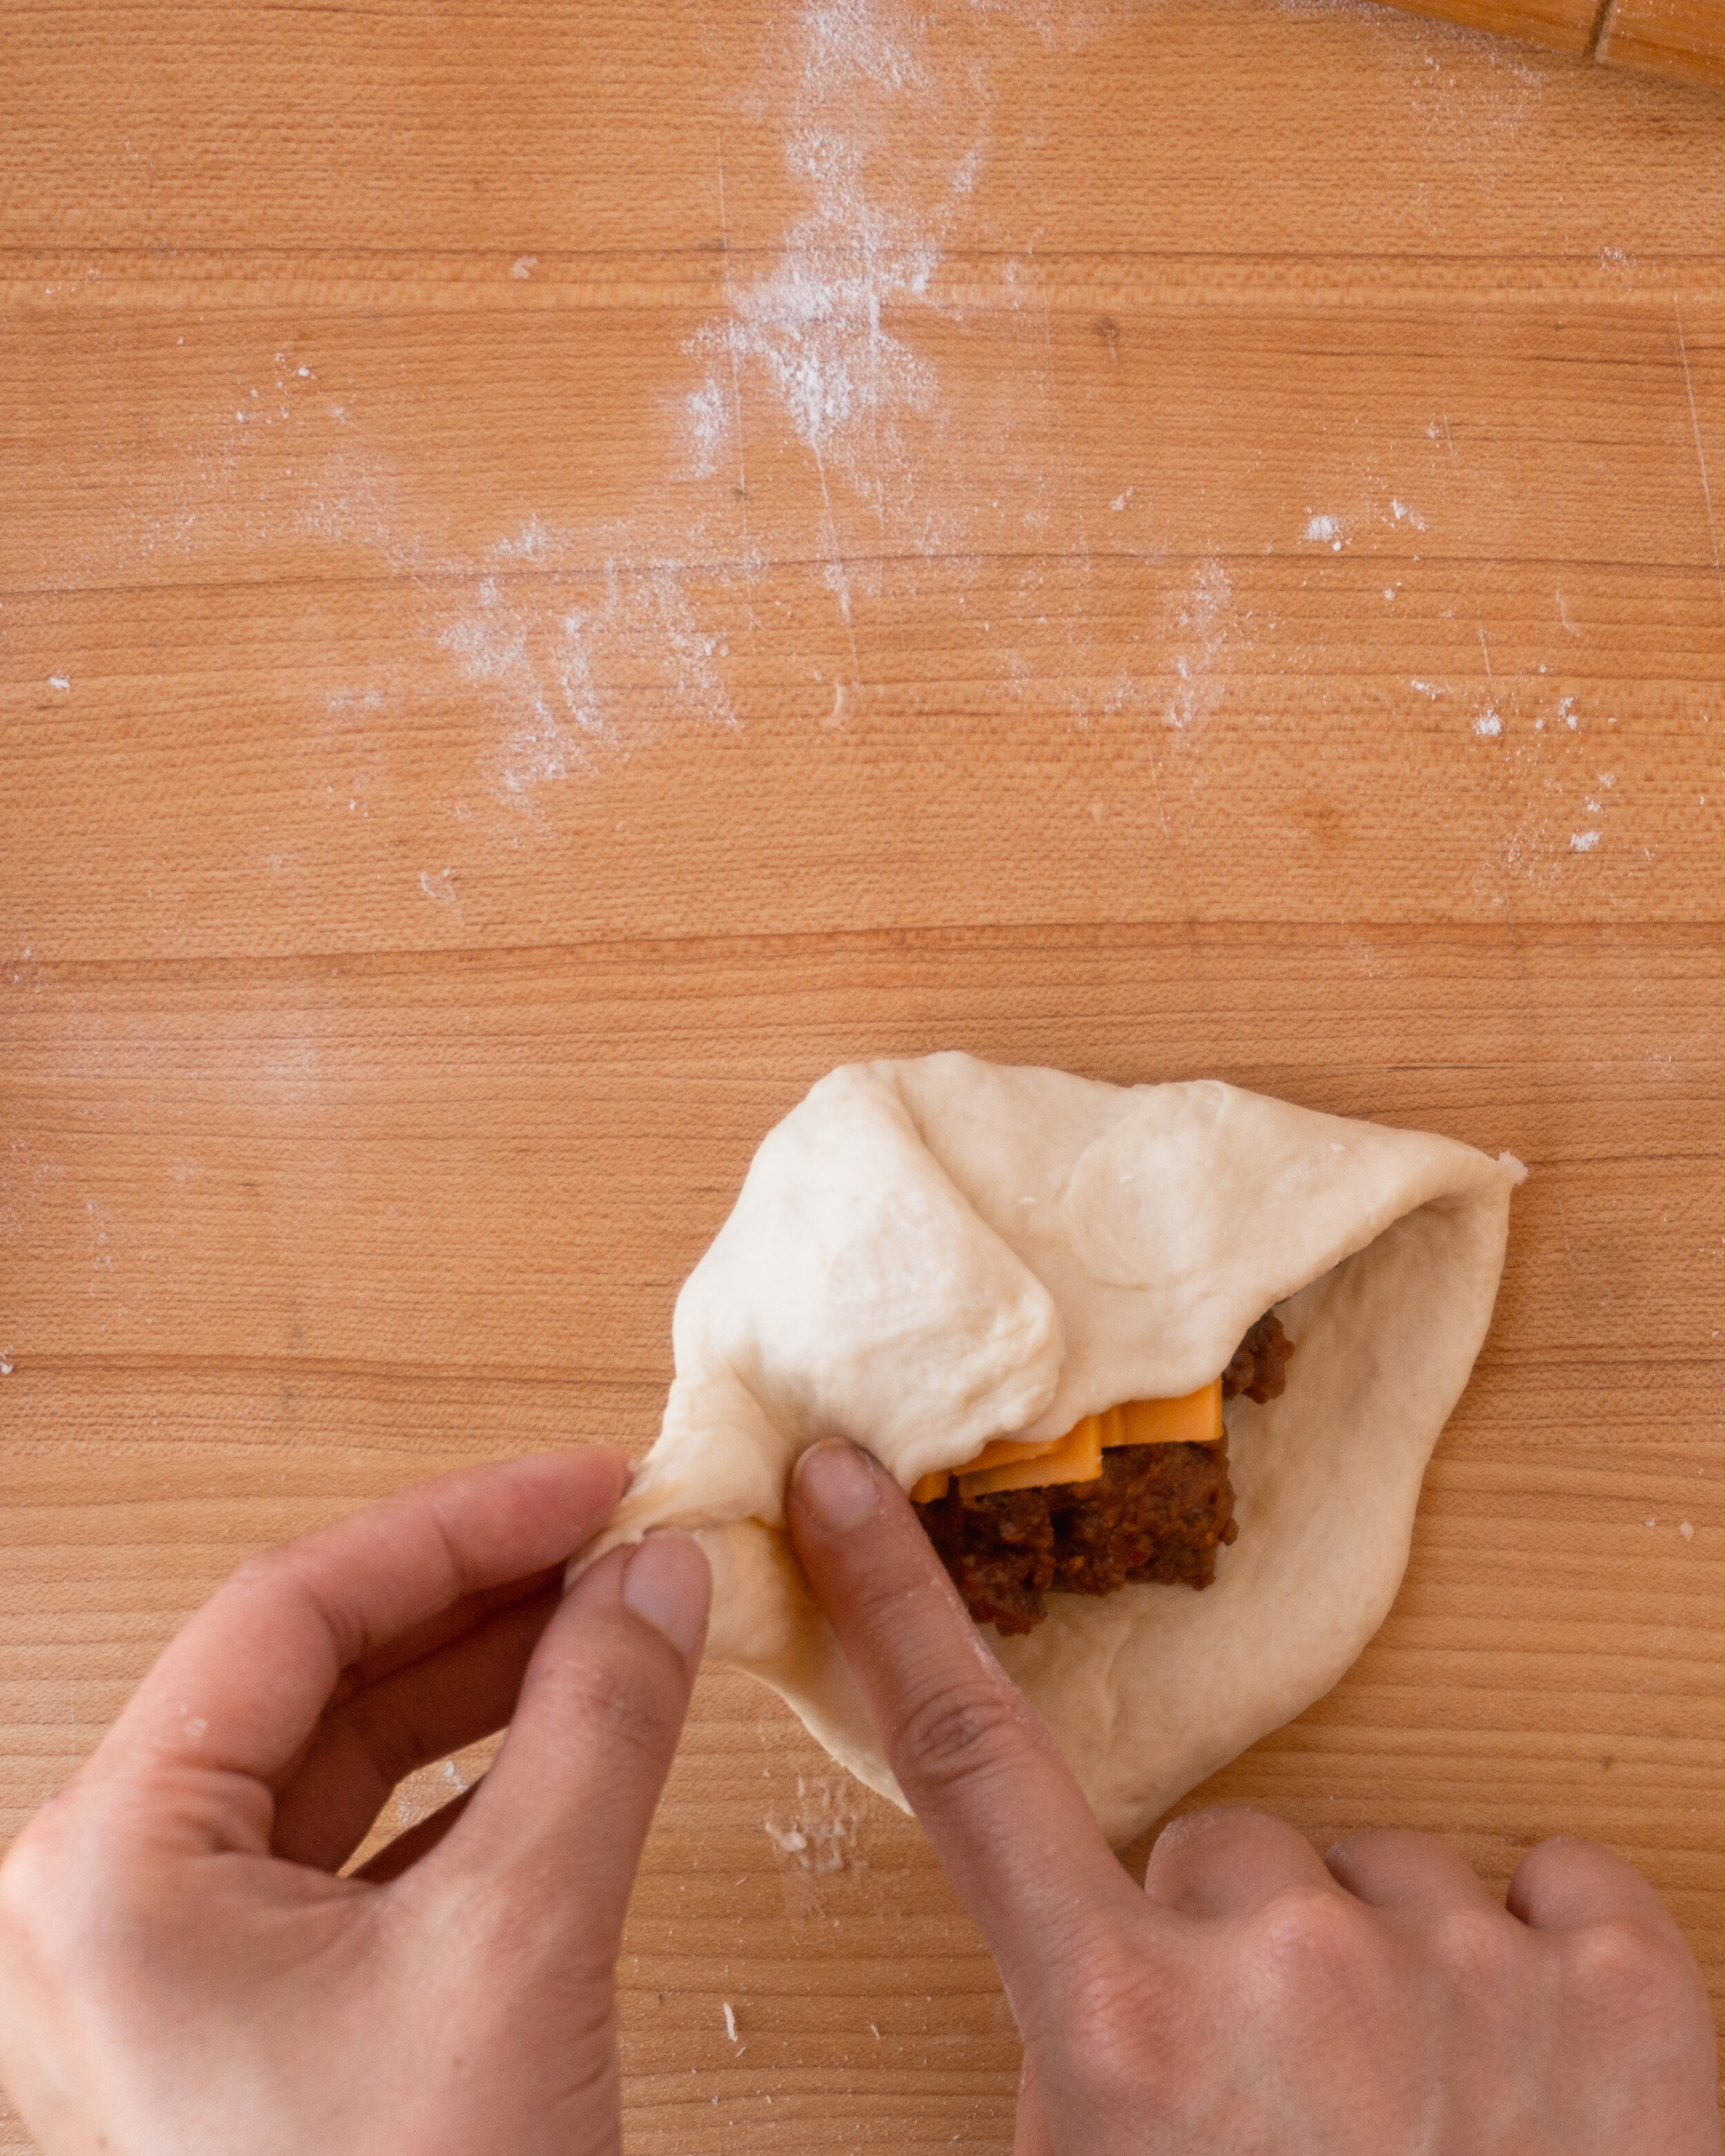
Place a tablespoon, or more if you’re an experienced bao sealer, of the beef chili filling in the center of the flattened bao. Then add the sliced or shredded cheese. Gather the edges over the filling and pinch them together to seal it on top (🎩The Fold Method). Take a moment ensure all the seams are well-pinched so the filling doesn’t leak out. Place the filled bao seam-side down on the parchment
Repeat steps 2-3 until you’ve used all the dough spacing the baos 2-3 inches apart.
Bake the baos
Once all the baos are filled, preheat the oven to 350°F. While the oven pre-heats, let the baos rest and rise again for 20-30 minutes. They should look puffy and soft before baking.
Just before putting the baos in the oven, whisk the egg and milk in a small bowl. Use a pastry or basting brush to paint the exterior of the baos with the egg wash.
Bake the baos at 350°F for 13-14 minutes. And if they aren’t brown enough to your liking, you may broil them for additional color — but watch them closely because they burn quickly! Remove from the oven and let cool on the trays for at least 5 minutes.
Enjoy!
Storage and re-heating: Cooled baos keep in an airtight container for up to a week in the refrigerator. To re-heat, either microwave for 30-40 seconds, or bake at 300°F for 5 minutes or until warmed through.
Hot Tips 🔥
CHOOSE YOUR OWN CHEESEVENTURE — I love a cheesy bao. But keep in mind that more cheese = higher chance of cheesy explosions! I’d start with ¼-⅓ cup for your first try at this recipe to master the folding method. Then, once you feel confident stuffing and sealing the baos, test your skill with the cheesy magma!
Tricks 🎩
YAY FOR YEASTIES — It’s important that your milk isn’t too hot, otherwise you will kill the yeast! If you accidentally warmed it too much, just let it cool down a bit before adding the yeast. If the milk is too cold, it’ll take longer for the yeast to activate.
MANUAL MODE — I HIGHLY suggest you use a stand mixer because this dough is very wet and requires a ton of kneading. However, it you are doing this by hand, try not to use any additional flour as you knead, otherwise the dough will be too tough. You’ll need to knead the dough for at least 25-30 minutes. It’s done kneading when you’re able to pull the dough into a thin translucent sheet, like in the process photo for using a stand mixer.
ALL BEEFED UP — The larger your chunks, the higher risk of puncturing the bao dough. So, it’s SUPER important to strengthen the dough before you roll (see TOUGHEN UP below)
FLOUR POWER — You may use a light sprinkling of flour to prevent sticking. However, I find that flour makes the baos harder to seal once stuffed. So, if you do flour the dough, use it sparingly. And be sure you seal the bao extra carefully to ensure they stay closed.
TOUGHEN UP — Folding the dough in on itself re-strengthens the gluten bonds that relaxed during the resting period. If the bonds aren’t re-developed, the dough can be too soft and easily pierced by the fillings, leading to bao explosions. Strengthening is especially important to if your beef chunks are quite large, which puts extra strain on the bao walls when sealing.
THE FOLD METHOD — Starting from the top and moving counter-clockwise, fold the bao toward the center. You should aim for at least 5-6 folds to ensure the filling is fully enclosed. Pinch the seams together to form a tight seal! For more instruction on how to fold the baos, see the video below!